
[Android] Room을 사용하여 로컬 데이터베이스에 데이터 저장2

예제 시작
Room에 대해 알아보았으니 간단한 예제를 만들어 보겠다. 크게 3가지 기능이 있는 앱이다.
- 입력한 텍스트 저장
- 저장된 데이터 리스트 표출
- 모든 데이터 삭제
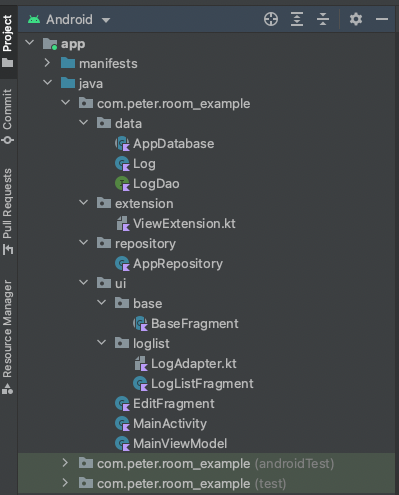
전체적인 구조는 이렇게 되어있다.
라이브러리 추가
먼저 라이브러리를 추가한다. 해당 예제는 room과 코루틴 라이브데이터를 사용하기에 다음과 같이 추가해준다.
dependencies {

    implementation 'androidx.activity:activity-ktx:1.4.0'
    implementation 'androidx.fragment:fragment-ktx:1.4.1'

    implementation "androidx.lifecycle:lifecycle-viewmodel-ktx:2.4.1"
    // LiveData
    implementation "androidx.lifecycle:lifecycle-livedata-ktx:2.4.1"

    // Room
    implementation "androidx.room:room-runtime:2.4.2"
    kapt "androidx.room:room-compiler:2.4.2"

    //coroutines
    implementation 'org.jetbrains.kotlinx:kotlinx-coroutines-android:1.5.2'
    implementation 'org.jetbrains.kotlinx:kotlinx-coroutines-play-services:1.5.2'
}
뷰바인딩도 사용하기에 뷰바인딩을 설정해준다.
android {
    viewBinding {
        enabled true
    }
}
Room 설정
먼저 데이터 소스쪽을 만들겠다.
Entity (Log)
사용할 데이터 모델이다 room에서 사용할 수 있도록 @Entity 주석으로 사용할 테이블임을 작성한다.
@PrimaryKey(autoGenerate = true) 기본 키이고 데이터가 생성될때마다 자동으로 1씩 올라간다.
@Entity(tableName = "logs")
data class Log(val msg : String, val timestamp: String){

    @PrimaryKey(autoGenerate = true)
    var id : Long = 0
}
DAO (LogDao)
데이터 접근 객체 클리스를 만들어준다. 먼저 DAO라는것을 @Dao 주석으로 표현한다.
각각의 팔요한 메소드를 만들고 그위에 주석을달아 데이터 접근 명령어를 입력한다.
@Dao
interface LogDao {

    @Query("SELECT * FROM logs ORDER BY id DESC")
    fun getAll(): List<Log>

    @Insert
    fun insertAll(vararg logs: Log)

    @Delete
    fun deleteItem(log : Log)
}
Database (AppDatabase)
이제 DB생성 및 관리하는 객체인 Database를 만들어준다. @Database 주석을 달아준다.
데이터 베이스는 싱글톤형태로 하나의 인스턴스만 생성되도록 만들어준다.
@Database(entities = [Log::class], version = 1, exportSchema = false)
abstract class AppDatabase : RoomDatabase() {
    companion object{
        private lateinit var instance: AppDatabase

        fun getInstance(application: Application): AppDatabase{
            synchronized(this){
                if (!::instance.isInitialized){
                    instance =
                        Room.databaseBuilder(
                            application,
                            AppDatabase::class.java,
                            "log-db"
                        ).build()
                }
            }
            return instance
        }
    }
    abstract fun logDao() : LogDao
}
synchronized는 공유 데이터를 사용하는 코드 영역을 임계 영역으로 지정해놓는다. 공유 데이터(객체)가 가지고 있는 lock을 획득한 후 하나의 스레드만 이영역 내의 코드를 수행할 수 있게 해준다.
한 스레드가 진행 중인 작업을 다른 스레드를 간섭하지 못하도록 막는 것을 스레드의 동기화라고 한다.
테이블 마이그레이션
작업을 하다보면 테이블이 바뀌어야할 때가 있다.기존에 어플이 설치되어있는 상태에서 테이블이 변경된 어플을 설치하면 다음과 같은 에러가 발생한다.

스키마가 변경되었으면 버전을 올리라는 뜻이다.
그래서
@Database(entities = [Log::class], version = 1, exportSchema = false)
이걸
@Database(entities = [Log::class], version = 2, exportSchema = false)
로 수정해준다.
더 필요한것들이 있다.
버전을 올릴때마다 과거 버전을 사용하고있는 사용자의 데이터를 최신 버전 데이터에 맞춰 주어야한다.
이때 필요한것이 마이그레이션이다.
만약 log테이블에서 id컬럼을 다음버전에서 ids로 변경했다면 마이그레이션 클래스를 만들어 처리할 수 있다.
val MIGRATION_1_2: Migration = object : Migration(1, 2) {
    override fun migrate(database: SupportSQLiteDatabase) {
        database.execSQL("ALTER TABLE logs RENAME COLUMN id to ids")
    }
}
그리고 RoomDatabase클래스에 해당 내용을 추가해준다.
@Database(entities = [Log::class], version = 2, exportSchema = false)
abstract class AppDatabase : RoomDatabase() {
    companion object{
        private lateinit var instance: AppDatabase

        fun getInstance(application: Application): AppDatabase{
            synchronized(this){
                if (!::instance.isInitialized){
                    instance =
                        Room.databaseBuilder(
                            application,
                            AppDatabase::class.java,
                            "log-db",

                        ).addMigrations(MIGRATION_1_2).build()
                }
            }
            return instance
        }

        private val MIGRATION_1_2: Migration = object : Migration(1, 2) {
            override fun migrate(database: SupportSQLiteDatabase) {
                database.execSQL("ALTER TABLE logs RENAME COLUMN id to ids")
            }
        }

    }
    abstract fun logDao() : LogDao
}
이건 수동으로 마이그레이션을 해주는것이고 자동 마이그레이션을 추가할 수 도있다.
간단하기에 해당내용은 여기서 찾아보면된다.
Repository 작성
레파지토리를 만들어 데이터 입출력을 관리한다.
class AppRepository (applicationContext : Application){
    private val logDao : LogDao
    private var context : Application
    init {
        val appDatabase = AppDatabase.getInstance(applicationContext)
        this.context = applicationContext
        logDao = appDatabase.logDao()
    }
    companion object{
        private lateinit var instance: AppRepository
        fun getInstance(application: Application): AppRepository{
            if (!::instance.isInitialized){
                instance = AppRepository(application)
            }
            return instance
        }
    }

    fun getAllMemoList(): List<Log> = logDao.getAll()

    suspend fun insertLog(log : Log){
        withContext(Dispatchers.IO){
            logDao.insertAll(log)
        }
    }
    suspend fun deleteLog(log: Log){
        withContext(Dispatchers.IO){
            logDao.deleteItem(log)
        }
    }
    fun clearAllTables(){
        AppDatabase.getInstance(context).clearAllTables()
    }
}
Repository도 마찬가지로 싱글톤 패턴으로 만들어 준다.
ViewModel 만들기
프래그먼트 변경 및 데이터를 가공할 수 있도록 만들어준다.
class MainViewModel(application: Application): AndroidViewModel(application) {
    private val ioScope = CoroutineScope(Dispatchers.IO + SupervisorJob())
    enum class FragmentStep {
        EDIT, LOG
    }
    private val appRepository = AppRepository.getInstance(getApplication())

    val liveFragmentStep = MutableLiveData(FragmentStep.EDIT)
    val getLogData = MutableLiveData<List<Log>>()

    fun saveLog(log : String){
        viewModelScope.launch {
            appRepository.insertLog(Log(log,getCurrentDate()))
        }
    }

    fun deleteLog(position : Int) = ioScope.launch{
        val log = getLogData.value?.get(position)
        if (log != null){
            appRepository.deleteLog(log)
            getLog()
        }
    }

    fun clearAllTables() = ioScope.launch{
        appRepository.clearAllTables()
        getLog()
    }

    fun getLog() = ioScope.launch{
        getLogData.postValue(appRepository.getAllMemoList())
    }

    private fun getCurrentDate(): String {
        val dateFormat = SimpleDateFormat("yyyy-MM-dd HH:mm", Locale.getDefault())
        return dateFormat.format(Date())
    }
}
비동기 동작을 위해 코루틴 스코프를 만들고 각각의 메소드에 추가 시켜준다.
처리된 데이터는 라이브데이터를 통해 View로 넘어가게된다.
UI 만들기
이제 비즈니스 로직이 완성되었다. 이제 UI를 만들겠다.
UI는 간단하기에 빠르게 넘어가겠다.
Base Fragment
프래그먼트는 자주 사용되어진다. 프래그먼트를 추가할때마다 세팅을 일일이 해주면 매우 귀찮을 것이다.
이런 중복 코드를 줄이기 위해 중복 코드를 넣은 베이스 프래그먼트를 만들고 그 베이스 프래그먼트를 상속 받는 식으로 만들면 간단하고 깔끔하게 그때그때마다 생성할 수 있다.
abstract class BaseFragment<VB:ViewBinding>(private val bindingInflater:(inflater: LayoutInflater) -> VB) : Fragment() {
    lateinit var binding : VB

    override fun onCreateView(
        inflater: LayoutInflater,
        container: ViewGroup?,
        savedInstanceState: Bundle?
    ): View? {
        binding = bindingInflater.invoke(inflater)
        return binding.root
    }
}
여기서는 간단하게 뷰바인딩과 프래그먼트 세팅까지만 넣기로했다.
ViewExtension
각 화면마다 상단바를 만들어 뒤로갈수있는 기능과 해당화면의 이름을 표출하도록 할예정이다. 이것도 프래그먼트마다 만들어야하기에 따로 빼두면 좋다. 베이스 프래그먼트에 넣어도 되지만 다른케이스를 보여주고싶어 만들게 되었다.
- layout_toolbar
<?xml version="1.0" encoding="utf-8"?>
<androidx.constraintlayout.widget.ConstraintLayout xmlns:android="http://schemas.android.com/apk/res/android"
    android:layout_width="match_parent"
    android:layout_height="56dp"
    xmlns:app="http://schemas.android.com/apk/res-auto"
    xmlns:tools="http://schemas.android.com/tools">
    <androidx.appcompat.widget.AppCompatImageButton
        android:id="@+id/backButton"
        android:layout_width="wrap_content"
        android:layout_height="match_parent"
        android:paddingStart="10dp"
        android:paddingEnd="10dp"
        app:layout_constraintStart_toStartOf="parent"
        android:src="@drawable/back"
        android:background="@color/white"/>

    <TextView
        android:id="@+id/title"
        android:layout_width="wrap_content"
        android:layout_height="wrap_content"
        android:layout_marginStart="10dp"
        app:layout_constraintStart_toEndOf="@+id/backButton"
        app:layout_constraintTop_toTopOf="@+id/backButton"
        app:layout_constraintBottom_toBottomOf="@+id/backButton"
        android:textColor="@color/black"
        android:textSize="15dp"
        tools:text="기록화면"/>
</androidx.constraintlayout.widget.ConstraintLayout>
- ViewExtension.kt
fun initToolbar(toolbar: LayoutToolbarBinding, title : String, backClickVisible : Boolean , backClick:(() -> Unit)? = null){
    toolbar.apply {
        this.title.text = title
        this.backButton.visibility = if (backClickVisible) View.VISIBLE else View.GONE
        this.backButton.setOnClickListener {
            backClick?.invoke()
        }
    }
}
이런식으로 메소드를 만든다. 상단바를 사용할 레이아웃에 상단바 레이아웃을 인클루드 시킨다음에 해당 메소드를 프래그먼트 객체에 추가해주면 간단하게 동작한다.
class LogListFragment : BaseFragment<FragmentLogBinding>(FragmentLogBinding::inflate),LogAdapter.LogListListener {

    override fun onViewCreated(view: View, savedInstanceState: Bundle?) {
        super.onViewCreated(view, savedInstanceState)

        initToolbar(binding.toolbar, "로그 기록", backClickVisible = true, backClick = {
            requireActivity().onBackPressed()
        })

    }
}
EditFragment
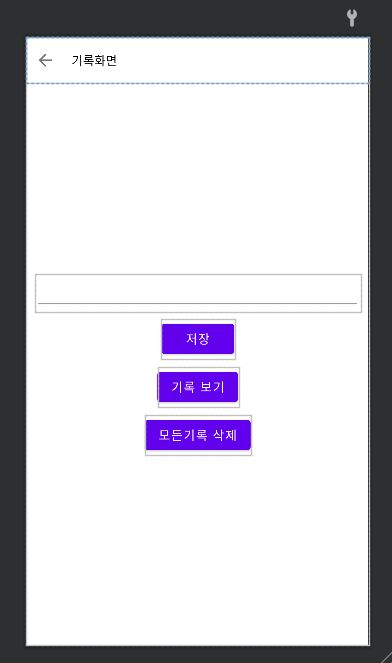
이제 텍스트를 입력하고 저장하는 화면을 만들겠다.
- fragment_edit
<?xml version="1.0" encoding="utf-8"?>
<androidx.constraintlayout.widget.ConstraintLayout xmlns:android="http://schemas.android.com/apk/res/android"
    android:layout_width="match_parent"
    android:layout_height="match_parent"
    xmlns:app="http://schemas.android.com/apk/res-auto">

    <androidx.constraintlayout.widget.ConstraintLayout
        android:id="@+id/layout_toolbar"
        android:layout_width="match_parent"
        android:layout_height="wrap_content"
        app:layout_constraintTop_toTopOf="parent"
        android:background="@color/white" >
        <include
            android:id="@+id/toolbar"
            layout="@layout/layout_toolbar"/>
    </androidx.constraintlayout.widget.ConstraintLayout>

    <EditText
        android:id="@+id/editText"
        android:layout_width="match_parent"
        android:layout_height="wrap_content"
        android:layout_marginStart="10dp"
        android:layout_marginEnd="10dp"
        app:layout_constraintTop_toBottomOf="@+id/layout_toolbar"
        app:layout_constraintStart_toStartOf="parent"
        app:layout_constraintEnd_toEndOf="parent"
        app:layout_constraintBottom_toTopOf="@+id/saveButton"
        app:layout_constraintVertical_chainStyle="packed"/>

    <com.google.android.material.button.MaterialButton
        android:id="@+id/saveButton"
        android:layout_width="wrap_content"
        android:layout_height="wrap_content"
        android:layout_marginTop="10dp"
        app:layout_constraintTop_toBottomOf="@+id/editText"
        app:layout_constraintStart_toStartOf="parent"
        app:layout_constraintEnd_toEndOf="parent"
        app:layout_constraintBottom_toTopOf="@+id/showLogButton"
        android:textSize="15dp"
        android:text="저장"/>

    <com.google.android.material.button.MaterialButton
        android:id="@+id/showLogButton"
        android:layout_width="wrap_content"
        android:layout_height="wrap_content"
        android:layout_marginTop="10dp"
        app:layout_constraintTop_toBottomOf="@+id/saveButton"
        app:layout_constraintStart_toStartOf="parent"
        app:layout_constraintEnd_toEndOf="parent"
        app:layout_constraintBottom_toTopOf="@+id/deleteButton"
        android:textSize="15dp"
        android:text="기록 보기"/>

    <com.google.android.material.button.MaterialButton
        android:id="@+id/deleteButton"
        android:layout_width="wrap_content"
        android:layout_height="wrap_content"
        android:layout_marginTop="10dp"
        app:layout_constraintTop_toBottomOf="@+id/showLogButton"
        app:layout_constraintStart_toStartOf="parent"
        app:layout_constraintEnd_toEndOf="parent"
        app:layout_constraintBottom_toBottomOf="parent"
        android:textSize="15dp"
        android:text="모든기록 삭제"/>
</androidx.constraintlayout.widget.ConstraintLayout>
- EditFragment.kt
class EditFragment : BaseFragment<FragmentEditBinding>(FragmentEditBinding::inflate) {
    private val viewModel : MainViewModel by activityViewModels()

    override fun onViewCreated(view: View, savedInstanceState: Bundle?) {
        super.onViewCreated(view, savedInstanceState)
        initToolbar(binding.toolbar,"로그 입력", backClickVisible = false)
        binding.showLogButton.setOnClickListener {
            viewModel.liveFragmentStep.value = MainViewModel.FragmentStep.LOG
        }

        binding.saveButton.setOnClickListener {
            if (binding.editText.text.toString().isEmpty()){
                Toast.makeText(requireContext(),"내용을 입력하세요.",Toast.LENGTH_SHORT).show()
            }else{
                viewModel.saveLog(binding.editText.text.toString())
                Toast.makeText(requireContext(),"저장 완료",Toast.LENGTH_SHORT).show()
            }
        }

        binding.deleteButton.setOnClickListener {
            viewModel.clearAllTables()
        }
    }
}
이 화면에서 데이터를 저장하거나 전체데이터를 지운다.
LogListFragment
데이터를 보여주기위해 리사이클러뷰를 사용한다. 먼저 리스트 어탭터를 만들어준다.
- LogAdapter
<?xml version="1.0" encoding="utf-8"?>
<androidx.constraintlayout.widget.ConstraintLayout
    android:id="@+id/container"
    xmlns:android="http://schemas.android.com/apk/res/android"
    android:layout_width="match_parent"
    android:layout_height="wrap_content"
    android:background="?attr/selectableItemBackground"
    xmlns:app="http://schemas.android.com/apk/res-auto"
    xmlns:tools="http://schemas.android.com/tools"
    android:padding="15dp">

    <TextView
        android:id="@+id/log"
        android:layout_width="0dp"
        android:layout_height="wrap_content"
        app:layout_constraintTop_toTopOf="parent"
        app:layout_constraintBottom_toBottomOf="parent"
        app:layout_constraintStart_toStartOf="parent"
        app:layout_constraintEnd_toStartOf="@+id/date"
        app:layout_constraintHorizontal_chainStyle="spread"
        android:gravity="start"
        tools:text="안녕하세요."
        android:textColor="@color/black"
        android:textSize="25sp"/>

    <TextView
        android:id="@+id/date"
        android:layout_width="0dp"
        android:layout_height="wrap_content"
        app:layout_constraintTop_toTopOf="parent"
        app:layout_constraintBottom_toBottomOf="parent"
        app:layout_constraintStart_toEndOf="@+id/log"
        app:layout_constraintEnd_toEndOf="parent"
        android:gravity="end"
        tools:text="2022.4.23"
        android:textSize="20sp"/>
</androidx.constraintlayout.widget.ConstraintLayout>
class LogAdapter(private val listener:LogListListener):ListAdapter<Log,ItemHolder>(
    object : DiffUtil.ItemCallback<Log>(){
        override fun areItemsTheSame(oldItem: Log, newItem: Log): Boolean {
            return oldItem.id == newItem.id
        }
        override fun areContentsTheSame(oldItem: Log, newItem: Log): Boolean {
            return oldItem.id != newItem.id
        }
    }
) {

    interface LogListListener {
        fun onLogItemClick(log: String)
        fun onLogItemLongClick(position: Int)
    }

    override fun onCreateViewHolder(parent: ViewGroup, viewType: Int): ItemHolder {
        val binding = ListItemBinding.inflate(LayoutInflater.from(parent.context),parent,false)
        return ItemHolder(binding)
    }

    override fun onBindViewHolder(holder: ItemHolder, position: Int) {
        holder.apply {
            setListener(listener,getItem(position))
            onBind(getItem(position))
        }
    }
}

class ItemHolder(private val binding: ListItemBinding) : RecyclerView.ViewHolder(binding.root) {

    fun onBind(log: Log){
        binding.log.text = log.msg
        binding.date.text = log.timestamp
    }

    fun setListener(listener: LogAdapter.LogListListener,log: Log) {
        binding.container.apply {
            setOnClickListener {
                if (adapterPosition != RecyclerView.NO_POSITION) {
                    listener.onLogItemClick(log.msg)
                }
            }
            setOnLongClickListener {
                if (adapterPosition != RecyclerView.NO_POSITION) {
                    listener.onLogItemLongClick(adapterPosition)
                }
                return@setOnLongClickListener true
            }
        }
    }
}
뷰를 길게 누르면 해당 데이터를 지우고 짧게 누르면 해당데이터를 토스트로 표출해주기 위해 리스너를 만들어준다.
- LogListFragment
class LogListFragment : BaseFragment<FragmentLogBinding>(FragmentLogBinding::inflate),LogAdapter.LogListListener {
    private val viewModel : MainViewModel by activityViewModels()

    override fun onViewCreated(view: View, savedInstanceState: Bundle?) {
        super.onViewCreated(view, savedInstanceState)
        viewModelObserver()
        initToolbar(binding.toolbar, "로그 기록", backClickVisible = true, backClick = {
            requireActivity().onBackPressed()
        })

        binding.recyclerView.apply {
            addItemDecoration(
                DividerItemDecoration(
                    requireContext(),
                    DividerItemDecoration.VERTICAL
                )
            )
            adapter = LogAdapter(this@LogListFragment)
        }
    }

    override fun onLogItemClick(log: String) {
        Toast.makeText(requireContext(), log,Toast.LENGTH_SHORT).show()
    }

    override fun onLogItemLongClick(position: Int) {
        viewModel.deleteLog(position)
    }

    private fun viewModelObserver(){
        viewModel.getLog()
        viewModel.getLogData.observe(viewLifecycleOwner){
            (binding.recyclerView.adapter as LogAdapter).submitList(it)
        }
    }
}
프래그먼트에 LogAdapter.LogListListener 를 연결시켜 클릭리스너를 오버라이드로 가져오고 그곳에서 처리를 해준다.
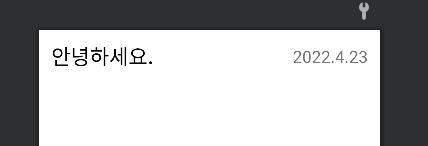
실행시키면 다음과 같이 나온다.
전체 코드는 아래 링크에서 볼 수 있다.
https://github.com/cellodove/Room_Example
참조
https://developer.android.com/training/data-storage/room/migrating-db-versions?hl=ko