
[Android] Hilt를 사용한 DI(의존성 주입)3

Navigator
힐트 설명이 길었다. 이제 화면 전환을 위해 네비게이터를 만들어 준다.
- AppNavigator
네비게이션 인터페이스다.
enum class Screens {
    BUTTONS,
    LOGS
}

interface AppNavigator {
    // Navigate to a given screen.
    fun navigateTo(screen: Screens)
}
- AppNavigatorImpl
네비게이션 구현체다.
class AppNavigatorImpl @Inject constructor(private val activity: FragmentActivity) : AppNavigator {

    override fun navigateTo(screen: Screens) {
        val fragment = when (screen) {
            Screens.BUTTONS -> ButtonsFragment()
            Screens.LOGS -> LogsFragment()
        }

        activity.supportFragmentManager.beginTransaction()
            .replace(R.id.main_container, fragment)
            .addToBackStack(fragment::class.java.canonicalName)
            .commit()
    }
}
전에 말한것처럼 의존성 주입을 하기위해 생성자에 @Inject를 붙여준다.
- NavigationModule
@InstallIn(ActivityComponent::class)
@Module
abstract class NavigationModule {

    @Binds
    abstract fun bindNavigator(impl: AppNavigatorImpl): AppNavigator
}
네비게이터 모듈이다. @InstallIn를 사용해 ActivityComponent의 생명주기에 맞추도록 설정한다. 그리고 abstract 클래스이기에 @Binds를 사용해준다.
비즈니스 로직 추가
화면에 데이터를 보여주게 하기 위해 먼저 비즈니스 로직을 추가해준다.
이 예제에서는 Room 라이브러리를 사용해 내부저장소에 데이터를 저장하거나 꺼내온다.
여기서는 룸 관련 내용은 다루지 않겠다.
- Log
@Entity(tableName = "logs")
data class Log(val msg: String, val timestamp: Long) {

    @PrimaryKey(autoGenerate = true)
    var id: Long = 0
}
데이터 모델이다. 어떤버튼을 눌렀는지 msg와 누른시간 timestamp, 그리고id가 입력된다.
- LogDao
@Dao
interface LogDao {

    @Query("SELECT * FROM logs ORDER BY id DESC")
    fun getAll(): List<Log>

    @Insert
    fun insertAll(vararg logs: Log)

    @Query("DELETE FROM logs")
    fun nukeTable()

    @Query("SELECT * FROM logs ORDER BY id DESC")
    fun selectAllLogsCursor(): Cursor

    @Query("SELECT * FROM logs WHERE id = :id")
    fun selectLogById(id: Long): Cursor?
}
데이터베이스의 data에 접근하기 위한 클래스다. 데이터베이스 접근을 하기 위한 로직과 비즈니스 로직을 분리하기 위해 사용한다.
- LoggerDataSource
interface LoggerDataSource {
    fun addLog(msg: String)
    fun getAllLogs(callback: (List<Log>) -> Unit)
    fun removeLogs()
}
Logger 데이터 소스를 위한 공통 인터페이스이다.
- LoggerInMemoryDataSource
class LoggerInMemoryDataSource @Inject constructor() : LoggerDataSource {

    private val logs = LinkedList<Log>()

    override fun addLog(msg: String) {
        logs.addFirst(Log(msg, System.currentTimeMillis()))
    }

    override fun getAllLogs(callback: (List<Log>) -> Unit) {
        callback(logs)
    }

    override fun removeLogs() {
        logs.clear()
    }
}
일단 데이터를 메모리에 올리기위해 있는 클래스이다.
- LoggerLocalDataSource
class LoggerLocalDataSource @Inject constructor(private val logDao: LogDao) : LoggerDataSource {

    private val executorService: ExecutorService = Executors.newFixedThreadPool(4)
    private val mainThreadHandler by lazy {
        Handler(Looper.getMainLooper())
    }

    override fun addLog(msg: String) {
        executorService.execute {
            logDao.insertAll(
                Log(
                    msg,
                    System.currentTimeMillis()
                )
            )
        }
    }

    override fun getAllLogs(callback: (List<Log>) -> Unit) {
        executorService.execute {
            val logs = logDao.getAll()
            mainThreadHandler.post { callback(logs) }
        }
    }

    override fun removeLogs() {
        executorService.execute {
            logDao.nukeTable()
        }
    }
}
데이터베이스와 UI 간의 데이터 조작을 처리하는 데이터 관리자 클래스이다. UI표출과 데이터 입출력이 다른쓰레드에서 동작하기때문에 그부분을 처리한다.
- AppDatabase
@Database(entities = [Log::class], version = 1, exportSchema = false)
abstract class AppDatabase : RoomDatabase() {
    abstract fun logDao(): LogDao
}
RoomDatabase를 만들어준다.
이제 의존성 주입을 위해 모듈을 만들어준다.
왜 각각의 모듈을 만들어 주어야 할까?
각 생명주기가 다르기때문이다.
각 컴포넌트가 다르기때문이다.
Hilt 모듈에는 비정적 결합 메서드와 추상 결합 메서드를 모두 포함할 수 없으므로 동일한 클래스에 @Binds와 @Provides 주석을 배치하면 안 되기때문이다.
- DatabaseModule
@InstallIn(SingletonComponent::class)
@Module
object DatabaseModule {

    @Provides
    @Singleton
    fun provideDatabase(@ApplicationContext appContext: Context): AppDatabase {
        return Room.databaseBuilder(
            appContext,
            AppDatabase::class.java,
            "logging.db"
        ).build()
    }

    @Provides
    fun provideLogDao(database: AppDatabase): LogDao {
        return database.logDao()
    }
}
여기서 @Singleton 라는것이 등장한다. 이 어노테이션은 인스턴스 범위를 애플리케이션 컨테이너로 지정해준다.
이 주석을 사용하면 유형이 다른 유형의 종속 항목으로 사용되는지 또는 삽입된 필드여야 하는지와 관계없이 애플리케이션 컨테이너에서 항상 같은 인스턴스를 제공해준다.
데이터베이스는 하나의 인스턴스만 존제해야하기에 싱글톤 형태로 만들어준다.
그리고 밑에서 나오겠지만 LoggerLocalDataSource도 어플리케이션 컨테이너로 지정되므로 어플리케이션단에서 logDao를 사용할 수 있어야한다. 그래서 @InstallIn(SingletonComponent::class)로 설정해준다.
그리고 컨텍스트를 어플리케이션 컨텍스트로 생성하기위해 @ApplicationContext 를 달아준다.
- LoggingModule
@Qualifier
annotation class InMemoryLogger

@Qualifier
annotation class DatabaseLogger

@InstallIn(SingletonComponent::class)
@Module
abstract class LoggingDatabaseModule {

    @DatabaseLogger
    @Singleton
    @Binds
    abstract fun bindDatabaseLogger(impl: LoggerLocalDataSource): LoggerDataSource
}

@InstallIn(ActivityComponent::class)
@Module
abstract class LoggingInMemoryModule {

    @InMemoryLogger
    @ActivityScoped
    @Binds
    abstract fun bindInMemoryLogger(impl: LoggerInMemoryDataSource): LoggerDataSource
}
현재 Hilt는 LoggerInMemoryDataSource와 LoggerLocalDataSource의 인스턴스 제공 방법은 알고 있지만, LoggerDataSource의 경우는 어떠한가 Hilt는 LoggerDataSource를 요청 시 사용할 구현에 관해 모른다.
이전에 살펴본 것처럼, 모듈에서 @Binds주석을 사용하여 Hilt에 사용할 구현을 알려 줄 수 있다.
하지만, 동일한 프로젝트에서 두 구현을 모두 제공해야 한다면 어떻게 해야할까? 예를 들어, 앱이 실행되는 동안 LoggerInMemoryDataSource를 사용하고 Service에서는 LoggerLocalDataSource를 사용하는 경우이다.
한번 살펴 보자, 먼저 LoggerInMemoryDataSource의 범위는 Activity컨테이너로, LoggerLocalDataSource는 Application컨테이너로 지정한다.
만약 @Qualifier없이 빌드를하면 DuplicateBindings 오류가 발생한다.
이는 LoggerDataSource유형이 Fragment에 삽입되어 있지만, Hilt는 같은 유형에 두 개의 결합이 있어 어느 구현을 사용해야 하는지 모르기 때문이다.
이럴때 사용하는게 @Qualifier(한정자)이다.
@Qualifier는 Hilt에 동일한 유형의 다른 구현(여러 개의 결합)을 제공하는 방법을 알릴때 사용한다.
한정자는 결합을 식별하는 데 사용되는 어노테이션이다.
그래서 다음과 같이 추가한것이다.
@Qualifier
annotation class InMemoryLogger

@Qualifier
annotation class DatabaseLogger
이러한 한정자는 각 구현을 제공하는 @Binds(또는 필요한 경우 @Provides) 함수에 주석을 달아야한다.
@DatabaseLogger
@Singleton
@Binds
abstract fun bindDatabaseLogger(impl: LoggerLocalDataSource): LoggerDataSource

@InMemoryLogger
@ActivityScoped
@Binds
abstract fun bindInMemoryLogger(impl: LoggerInMemoryDataSource): LoggerDataSource
그래서 만약 로그를 메모리에서만 사용하고싶으면 아래처럼 주석을 달면되고
@AndroidEntryPoint
class LogsFragment : Fragment() {

    @InMemoryLogger
    @Inject lateinit var logger: LoggerDataSource
    ...
}
만약 로그를 내부 데이터베이스에 저장하고싶으면 아래처럼 바꿔주면된다.
@AndroidEntryPoint
class LogsFragment : Fragment() {

    @DatabaseLogger
    @Inject lateinit var logger: LoggerDataSource
    ...
}
UI추가2
비즈니스 로직및 모듈이 완성되었으니 마지막으로 프레그먼트를 만들겠다.
먼저 데이터 포메터클래스를 만들어 날짜를 표출할 수 있게한다.
- DateFormatter
/**
 * String formatter for the log dates.
 */
class DateFormatter @Inject constructor() {

    @SuppressLint("SimpleDateFormat")
    private val formatter = SimpleDateFormat("d MMM yyyy HH:mm:ss")

    fun formatDate(timestamp: Long): String {
        return formatter.format(Date(timestamp))
    }
}
버튼을 누르면 기록하는 화면을 만든다.
- ButtonsFragment
<?xml version="1.0" encoding="utf-8"?>
<androidx.constraintlayout.widget.ConstraintLayout
    xmlns:android="http://schemas.android.com/apk/res/android"
    xmlns:app="http://schemas.android.com/apk/res-auto"
    xmlns:tools="http://schemas.android.com/tools"
    android:layout_width="match_parent"
    android:layout_height="match_parent">

    <TextView
        android:id="@+id/textView"
        android:layout_width="0dp"
        android:layout_height="wrap_content"
        android:layout_marginLeft="32dp"
        android:layout_marginRight="32dp"
        android:text="@string/buttons_welcome"
        android:textAppearance="@style/TextAppearance.AppCompat.Large"
        app:layout_constraintBottom_toBottomOf="parent"
        app:layout_constraintLeft_toLeftOf="parent"
        app:layout_constraintRight_toRightOf="parent"
        app:layout_constraintTop_toTopOf="parent"
        app:layout_constraintVertical_bias="0.15" />

    <Button
        android:id="@+id/button1"
        android:layout_width="wrap_content"
        android:layout_height="wrap_content"
        android:layout_marginTop="32dp"
        android:text="@string/button_1"
        app:layout_constraintEnd_toEndOf="parent"
        app:layout_constraintStart_toStartOf="parent"
        app:layout_constraintTop_toBottomOf="@+id/textView" />

    <Button
        android:id="@+id/button2"
        android:layout_width="wrap_content"
        android:layout_height="wrap_content"
        android:layout_marginTop="16dp"
        android:text="@string/button_2"
        app:layout_constraintEnd_toEndOf="parent"
        app:layout_constraintStart_toStartOf="parent"
        app:layout_constraintTop_toBottomOf="@+id/button1" />

    <Button
        android:id="@+id/button3"
        android:layout_width="wrap_content"
        android:layout_height="wrap_content"
        android:layout_marginTop="16dp"
        android:text="@string/button_3"
        app:layout_constraintEnd_toEndOf="parent"
        app:layout_constraintStart_toStartOf="parent"
        app:layout_constraintTop_toBottomOf="@+id/button2" />

    <Button
        android:id="@+id/all_logs"
        android:layout_width="wrap_content"
        android:layout_height="wrap_content"
        android:text="@string/see_all_logs"
        app:layout_constraintBottom_toBottomOf="parent"
        app:layout_constraintEnd_toEndOf="parent"
        app:layout_constraintStart_toStartOf="parent"
        app:layout_constraintTop_toBottomOf="@+id/button3" />

    <Button
        android:id="@+id/delete_logs"
        style="@style/Widget.AppCompat.Button.Colored"
        android:layout_width="wrap_content"
        android:layout_height="wrap_content"
        android:text="@string/delete_logs"
        app:layout_constraintBottom_toBottomOf="parent"
        app:layout_constraintEnd_toEndOf="parent"
        app:layout_constraintStart_toStartOf="parent"
        app:layout_constraintTop_toBottomOf="@+id/all_logs" />

</androidx.constraintlayout.widget.ConstraintLayout>
@AndroidEntryPoint
class ButtonsFragment : Fragment() {

    @InMemoryLogger
    @Inject lateinit var logger: LoggerDataSource
    @Inject lateinit var navigator: AppNavigator

    override fun onCreateView(
        inflater: LayoutInflater,
        container: ViewGroup?,
        savedInstanceState: Bundle?
    ): View? {
        return inflater.inflate(R.layout.fragment_buttons, container, false)
    }

    override fun onViewCreated(view: View, savedInstanceState: Bundle?) {
        view.findViewById<Button>(R.id.button1).setOnClickListener {
            logger.addLog("Interaction with 'Button 1'")
        }

        view.findViewById<Button>(R.id.button2).setOnClickListener {
            logger.addLog("Interaction with 'Button 2'")
        }

        view.findViewById<Button>(R.id.button3).setOnClickListener {
            logger.addLog("Interaction with 'Button 3'")
        }

        view.findViewById<Button>(R.id.all_logs).setOnClickListener {
            navigator.navigateTo(Screens.LOGS)
        }

        view.findViewById<Button>(R.id.delete_logs).setOnClickListener {
            logger.removeLogs()
        }
    }
}
- LogsFragment
버튼을 누른기록을 볼 수 있는 화면을 만든다 여기서는 메모리에 저장되게 설정했다.
<?xml version="1.0" encoding="utf-8"?>
<androidx.constraintlayout.widget.ConstraintLayout xmlns:android="http://schemas.android.com/apk/res/android"
    xmlns:app="http://schemas.android.com/apk/res-auto"
    xmlns:tools="http://schemas.android.com/tools"
    android:layout_width="match_parent"
    android:layout_height="match_parent"
    tools:context=".ui.LogsFragment">

    <androidx.recyclerview.widget.RecyclerView
        android:id="@+id/recycler_view"
        android:layout_width="0dp"
        android:layout_height="0dp"
        app:layoutManager="androidx.recyclerview.widget.LinearLayoutManager"
        app:layout_constraintBottom_toBottomOf="parent"
        app:layout_constraintEnd_toEndOf="parent"
        app:layout_constraintStart_toStartOf="parent"
        app:layout_constraintTop_toTopOf="parent" />

</androidx.constraintlayout.widget.ConstraintLayout>
@AndroidEntryPoint
class LogsFragment : Fragment() {

    @InMemoryLogger
    @Inject
    lateinit var logger: LoggerDataSource
    @Inject
    lateinit var dateFormatter: DateFormatter

    private lateinit var recyclerView: RecyclerView

    override fun onCreateView(
        inflater: LayoutInflater,
        container: ViewGroup?,
        savedInstanceState: Bundle?
    ): View? {
        return inflater.inflate(R.layout.fragment_logs, container, false)
    }

    override fun onViewCreated(view: View, savedInstanceState: Bundle?) {
        recyclerView = view.findViewById<RecyclerView>(R.id.recycler_view).apply {
            setHasFixedSize(true)
        }
    }

    override fun onResume() {
        super.onResume()

        logger.getAllLogs { logs ->
            recyclerView.adapter =
                LogsViewAdapter(
                    logs,
                    dateFormatter
                )
        }
    }
}

/**
 * RecyclerView adapter for the logs list.
 */
private class LogsViewAdapter(
    private val logsDataSet: List<Log>,
    private val daterFormatter: DateFormatter
) : RecyclerView.Adapter<LogsViewAdapter.LogsViewHolder>() {

    class LogsViewHolder(val textView: TextView) : RecyclerView.ViewHolder(textView)

    override fun onCreateViewHolder(parent: ViewGroup, viewType: Int): LogsViewHolder {
        return LogsViewHolder(
            LayoutInflater.from(parent.context)
                .inflate(R.layout.text_row_item, parent, false) as TextView
        )
    }

    override fun getItemCount(): Int {
        return logsDataSet.size
    }

    @SuppressLint("SetTextI18n")
    override fun onBindViewHolder(holder: LogsViewHolder, position: Int) {
        val log = logsDataSet[position]
        holder.textView.text = "${log.msg}\n\t${daterFormatter.formatDate(log.timestamp)}"
    }
}
종속 클래스를 가져올때 힐트 주석을 사용하는것 말고는 크게 다른점이 없다.
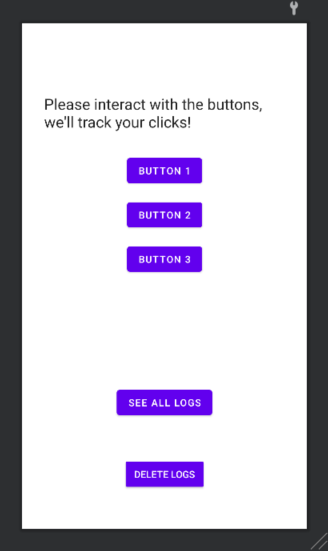
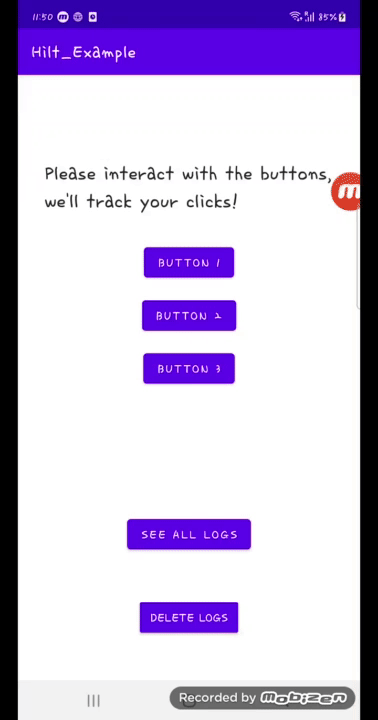
실행하면 다음과 같이 나온다.
전체 코드는 아래 링크에서 볼 수 있다.
https://github.com/cellodove/Hilt_Example
Hilt 추가 내용
@EntryPoint
Hilt에서 지원하지 않는 클래스에 종속 항목을 삽입할때 사용한다.
Hilt는 가장 일반적인 Android 구성요소를 지원한다. 그러나, Hilt에서 직접 지원하지 않거나 Hilt를 사용할 수 없는 클래스에 필드를 삽입해야 할 수 도있다. 이럴때 사용한다.
class GasolineCar(private val context:Context):Car{
    override fun oilType() : OilType = OilType.GASOLINE

    //필요한 스코프를 생각해서 InstallIn을 정한다.
    @InstallIn(ApplicationComponent::class)
    @EntryPoint // 이 녀석으로 hilt가 entryPoint임을 알 수 있게 된다.
    interface DbEntryPoint{
        fun database():AppDatabase
    }

    private fun getDb(context: Context):AppDatabase{
        //EntryPointAccessors:static accessor
        //다음의 파라미터들은 hilt-component가 알 수 있는 값들이어야 한다.
        //context는 디폴트로 가지고 있고, DbEntryPoint는 위에서 지정해 주었다.
        return EntryPointAccessors.fromApplication(
            context,
            DbEntryPoint::class.java
            ).database()
    }

    //그리고 사용한다.
    fun getDestination() = getDb(context).mapDao.destination
}
여기서 AppDatabase는 안드로이드 클래스나 내가 만든 클래스도 아니다 Room 라이브러리이다.
@Database(entities = [Log::class], version = 1, exportSchema = false)
abstract class AppDatabase : RoomDatabase() {
    abstract fun logDao(): LogDao
}
이런경우 의존성을 주입할 수 없는데 이런상황일때 사용한다.
참조
https://developer.android.com/codelabs/android-hilt?hl=ko#8
https://developer.android.com/training/dependency-injection/hilt-android?hl=ko