
[Android] Retrofit2를 이용해 REST API 통신

Retrofit 란?
Android에서 REST API를 지원하기 위한 라이브러리이다.
Retrofit 문서에서는 레트로핏을 다음과 같이 소개하고있다.
“Retrofit은 HTTP API를 자바 인터페이스 형태로 사용할 수 있습니다.”
존재하는 HTTP 통신 라이브러리 중 가장 많이 사용되는 라이브러리이다.
OkHttp 라이브러리의 상위 구현체이다.
그래서 레트로핏은 OkHttp를 네트워크 계층으로 활용하고 그 위에 구축된다.
라이브데이터나 플로우를 사용해 간단하게 데이터를 가져올 수 있다.
레트로핏 구성요소
레트로핏을 구성하는데 크게 3가지가 있으면 된다.
- 서버로부터 받을 데이터를 정의하는 Model 클래스
- 사용할 HTTP CRUD 메소드들을 정의해놓은 인터페이스
- 레트로핏을 생성해 서버와 통신하기위한 레트로핏 빌더 클래스
레트로핏 사용해보기
먼저 잘 알려진 REST API 테스트 사이트인 https://jsonplaceholder.typicode.com/ 를 사용하겠다.
사용할 URL은 https://jsonplaceholder.typicode.com/posts/1 이다.
응답 값은 다음과 같다.
{
   "userId": 1,
   "id": 1,
   "title": "sunt aut facere repellat provident occaecati excepturi optio reprehenderit",
   "body": "quia et suscipit\nsuscipit recusandae consequuntur expedita et cum\nreprehenderit molestiae ut ut quas totam\nnostrum rerum est autem sunt rem eveniet architecto"
 }
총 5개의 클래스가 필요하다.
- MainActivity - 호출 버튼 및 서버 값 화면 표출
- MainViewModel - 레트로핏을 사용해 데이터를 가져옴
- ApiResponse - 서버로부터 받을 데이터를 정의하는 Model 클래스
- ApiService - 사용할 HTTP CRUD 메소드들을 정의해놓은 인터페이스
- ApiRepository - 레트로핏을 생성해 서버와 통신하기위한 레트로핏 빌더 클래스
먼저 서버와 통신하기때문에 인터넷 퍼미션을 추가해준다.
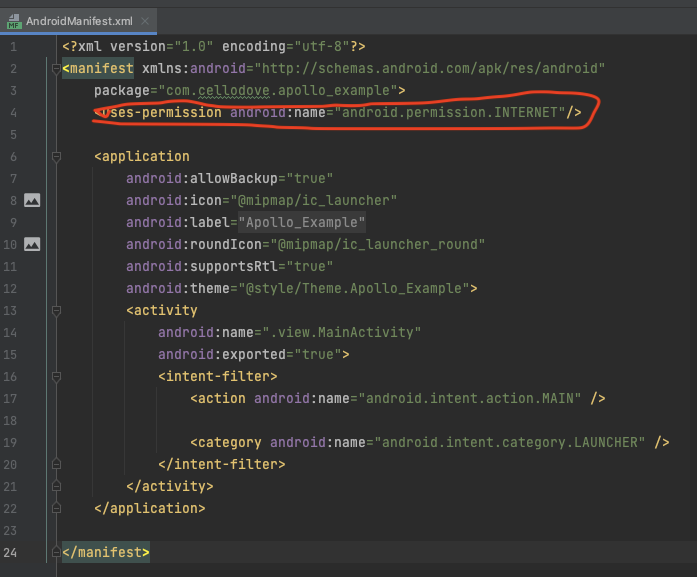
<uses-permission android:name="android.permission.INTERNET"/>
Dependency
이 프로젝트를 만들기 위한 라이브러리들을 먼저 추가한다.
dependencies {
    //코루틴 라이브러리 서버통신을 비동기적으로 가져오기위해 사용
    implementation 'org.jetbrains.kotlinx:kotlinx-coroutines-android:1.5.2'
    implementation 'org.jetbrains.kotlinx:kotlinx-coroutines-play-services:1.5.2'

    // Retrofit 라이브러리
    implementation 'com.squareup.retrofit2:retrofit:2.9.0'
    // Gson 변환기 라이브러리
    implementation 'com.squareup.retrofit2:converter-gson:2.9.0'
    // Scalars 변환기 라이브러리
    implementation 'com.squareup.retrofit2:converter-scalars:2.9.0'
    implementation 'com.squareup.okhttp3:logging-interceptor:4.9.0'

    //by viewModels() 사용하기위한 라이브러리 편하게 viewmodel 생성
    implementation 'androidx.activity:activity-ktx:1.4.0'
    implementation 'androidx.fragment:fragment-ktx:1.4.1'

    //라이브데이터 라이브러리
    implementation "androidx.lifecycle:lifecycle-viewmodel-ktx:2.4.1"
    implementation "androidx.lifecycle:lifecycle-livedata-ktx:2.4.1"
}
그리고
뷰바인딩을 사용하기에 뷰바인딩도 추가해주자
android {
    viewBinding {
        enabled true
    }
}
MainActivity
- xml
<?xml version="1.0" encoding="utf-8"?>
<androidx.constraintlayout.widget.ConstraintLayout xmlns:android="http://schemas.android.com/apk/res/android"
    xmlns:app="http://schemas.android.com/apk/res-auto"
    xmlns:tools="http://schemas.android.com/tools"
    android:layout_width="match_parent"
    android:layout_height="match_parent"
    tools:context=".view.MainActivity">

    <Button
        android:id="@+id/button"
        android:layout_width="wrap_content"
        android:layout_height="wrap_content"
        android:text="호출하기"
        app:layout_constraintLeft_toLeftOf="parent"
        app:layout_constraintRight_toRightOf="parent"
        app:layout_constraintTop_toTopOf="parent"
        android:layout_marginTop="20dp"/>

    <NumberPicker
        android:id="@+id/numberPicker"
        android:layout_width="wrap_content"
        android:layout_height="wrap_content"
        app:layout_constraintLeft_toLeftOf="parent"
        app:layout_constraintRight_toRightOf="parent"
        app:layout_constraintTop_toBottomOf="@+id/button"/>
    <LinearLayout
        android:layout_width="match_parent"
        android:layout_height="0dp"
        app:layout_constraintTop_toBottomOf="@+id/numberPicker"
        app:layout_constraintBottom_toBottomOf="parent"
        android:padding="10dp"
        android:orientation="vertical"
        android:gravity="center">
        <LinearLayout
            android:layout_width="match_parent"
            android:layout_height="wrap_content"
            android:orientation="horizontal"
            android:layout_marginTop="10dp"
            android:layout_marginBottom="10dp">
            <TextView
                android:layout_width="wrap_content"
                android:layout_height="wrap_content"
                android:textColor="@color/black"
                android:textStyle="bold"
                android:textSize="20dp"
                android:text="USER ID: "/>
            <TextView
                android:id="@+id/userId"
                android:layout_width="wrap_content"
                android:layout_height="wrap_content"
                android:textColor="@color/black"
                android:textStyle="bold"
                android:textSize="20dp"
                tools:text="10"/>
        </LinearLayout>
        <LinearLayout
            android:layout_width="match_parent"
            android:layout_height="wrap_content"
            android:orientation="horizontal"
            android:layout_marginTop="10dp"
            android:layout_marginBottom="10dp">
            <TextView
                android:layout_width="wrap_content"
                android:layout_height="wrap_content"
                android:textColor="@color/black"
                android:textStyle="bold"
                android:textSize="20dp"
                android:text="ID: "/>
            <TextView
                android:id="@+id/id"
                android:layout_width="wrap_content"
                android:layout_height="wrap_content"
                android:textColor="@color/black"
                android:textStyle="bold"
                android:textSize="20dp"
                tools:text="id"/>
        </LinearLayout>
        <LinearLayout
            android:layout_width="match_parent"
            android:layout_height="wrap_content"
            android:orientation="horizontal"
            android:layout_marginTop="10dp"
            android:layout_marginBottom="10dp">
            <TextView
                android:layout_width="wrap_content"
                android:layout_height="wrap_content"
                android:textColor="@color/black"
                android:textStyle="bold"
                android:textSize="20dp"
                android:text="TITLE: "/>
            <TextView
                android:id="@+id/title"
                android:layout_width="wrap_content"
                android:layout_height="wrap_content"
                android:textColor="@color/black"
                android:textStyle="bold"
                android:textSize="20dp"
                tools:text="title"/>
        </LinearLayout>
        <LinearLayout
            android:layout_width="match_parent"
            android:layout_height="wrap_content"
            android:orientation="horizontal"
            android:layout_marginTop="10dp"
            android:layout_marginBottom="10dp">
            <TextView
                android:layout_width="wrap_content"
                android:layout_height="wrap_content"
                android:textColor="@color/black"
                android:textStyle="bold"
                android:textSize="20dp"
                android:text="BODY: "/>
            <TextView
                android:id="@+id/body"
                android:layout_width="wrap_content"
                android:layout_height="wrap_content"
                android:textColor="@color/black"
                android:textStyle="bold"
                android:textSize="20dp"
                tools:text="body"/>
        </LinearLayout>
    </LinearLayout>

    <LinearLayout
        android:id="@+id/showProgress"
        android:layout_width="match_parent"
        android:layout_height="match_parent"
        android:gravity="center"
        android:background="#80000000"
        android:visibility="gone"
        android:clickable="false">
        <ProgressBar
            android:layout_width="wrap_content"
            android:layout_height="wrap_content"/>
    </LinearLayout>
</androidx.constraintlayout.widget.ConstraintLayout>
class MainActivity : AppCompatActivity() {
    private val viewModel : MainViewModel by viewModels()
    private val binding by lazy {
        ActivityMainBinding.inflate(layoutInflater)
    }
    override fun onCreate(savedInstanceState: Bundle?) {
        super.onCreate(savedInstanceState)
        setContentView(binding.root)
        binding.numberPicker.minValue = 0
        binding.numberPicker.maxValue = 100

        binding.button.setOnClickListener {
            val number = binding.numberPicker.value.toString()
            binding.showProgress.visibility = View.VISIBLE
            viewModel.callApi(number)
        }
        viewModel()
    }

    private fun viewModel(){
        viewModel.apiResponseLiveData.observe(this) { apiResponse ->
            binding.showProgress.visibility = View.GONE
            binding.apply {
                userId.text = apiResponse.userId.toString()
                id.text = apiResponse.id.toString()
                title.text = apiResponse.title
                body.text = apiResponse.body
            }
        }
        viewModel.serverError.observe(this){ e ->
            binding.showProgress.visibility = View.GONE
            binding.apply {
                userId.text = ""
                id.text = ""
                title.text = ""
                body.text = ""
            }
            Toast.makeText(this,"에러가 발생했습니다.\n${e.message}",Toast.LENGTH_SHORT).show()
        }

    }
}
https://jsonplaceholder.typicode.com/posts/{number}
해당 URL를 사용할때 앤드포인드에 따라 들어오는 결과값이 달라진다. 테스트를 해보니 해당 앤드포인트에 1~100를 입력할때 결과값이 온다.
그래서 numberPicker를 1~100로 설정하여 각각의 결과값을 가져올 수 있도록 한다.
그리고 호출하는데 살짝 딜레이가있어서 프로그래스 화면을 넣어준다.
버튼을 누르면 넘버픽의 값을 가져와 뷰모델의 callApi()메소드를 호출한다. 그후 데이터가 돌아오면 뷰모델에서 라이브데이터로 값을 가지고와 데이터를 화면에 표출해준다.
서버통신에 에러가나면 에러 라이브데이터로 에러를 받아 처리한다. (0를 보내면 에러가난다.)
MainViewModel
class MainViewModel : ViewModel() {
    var apiResponseLiveData = MutableLiveData<ApiResponse>()
    var serverError = MutableLiveData<Exception>()

    fun callApi(pageNumber: String) = GlobalScope.launch {
        try {
            apiResponseLiveData.postValue(ApiRepository.getCartApi().authSignUp(pageNumber))
        }catch (e:Exception){
            serverError.postValue(e)
        }
    }
}
뷰모델에서는 ApiRepository를 호출해 데이터를 가져온다. 들어온 데이터는 바로 라이브데이터로 넘겨준다.
코루틴의 글로벌 스코프를 사용한다.
에러처리를 레파지토리에서 할수있는데 이번에는 호출하는곳에서 처리하도록 했다.
에러가나면 에러내용을 에러처리 라이브데이터로 보내 토스트로 내용을 사용자에게 보여준다.
ApiResponse
data class ApiResponse(
    val userId : Int,
    val id : Int,
    val title : String,
    val body : String
)
Model 클래스는 코틀린에서 data class를 사용해 간단하게 만들수있다. 들어오는 데이터에 맞춰 만들어준다.
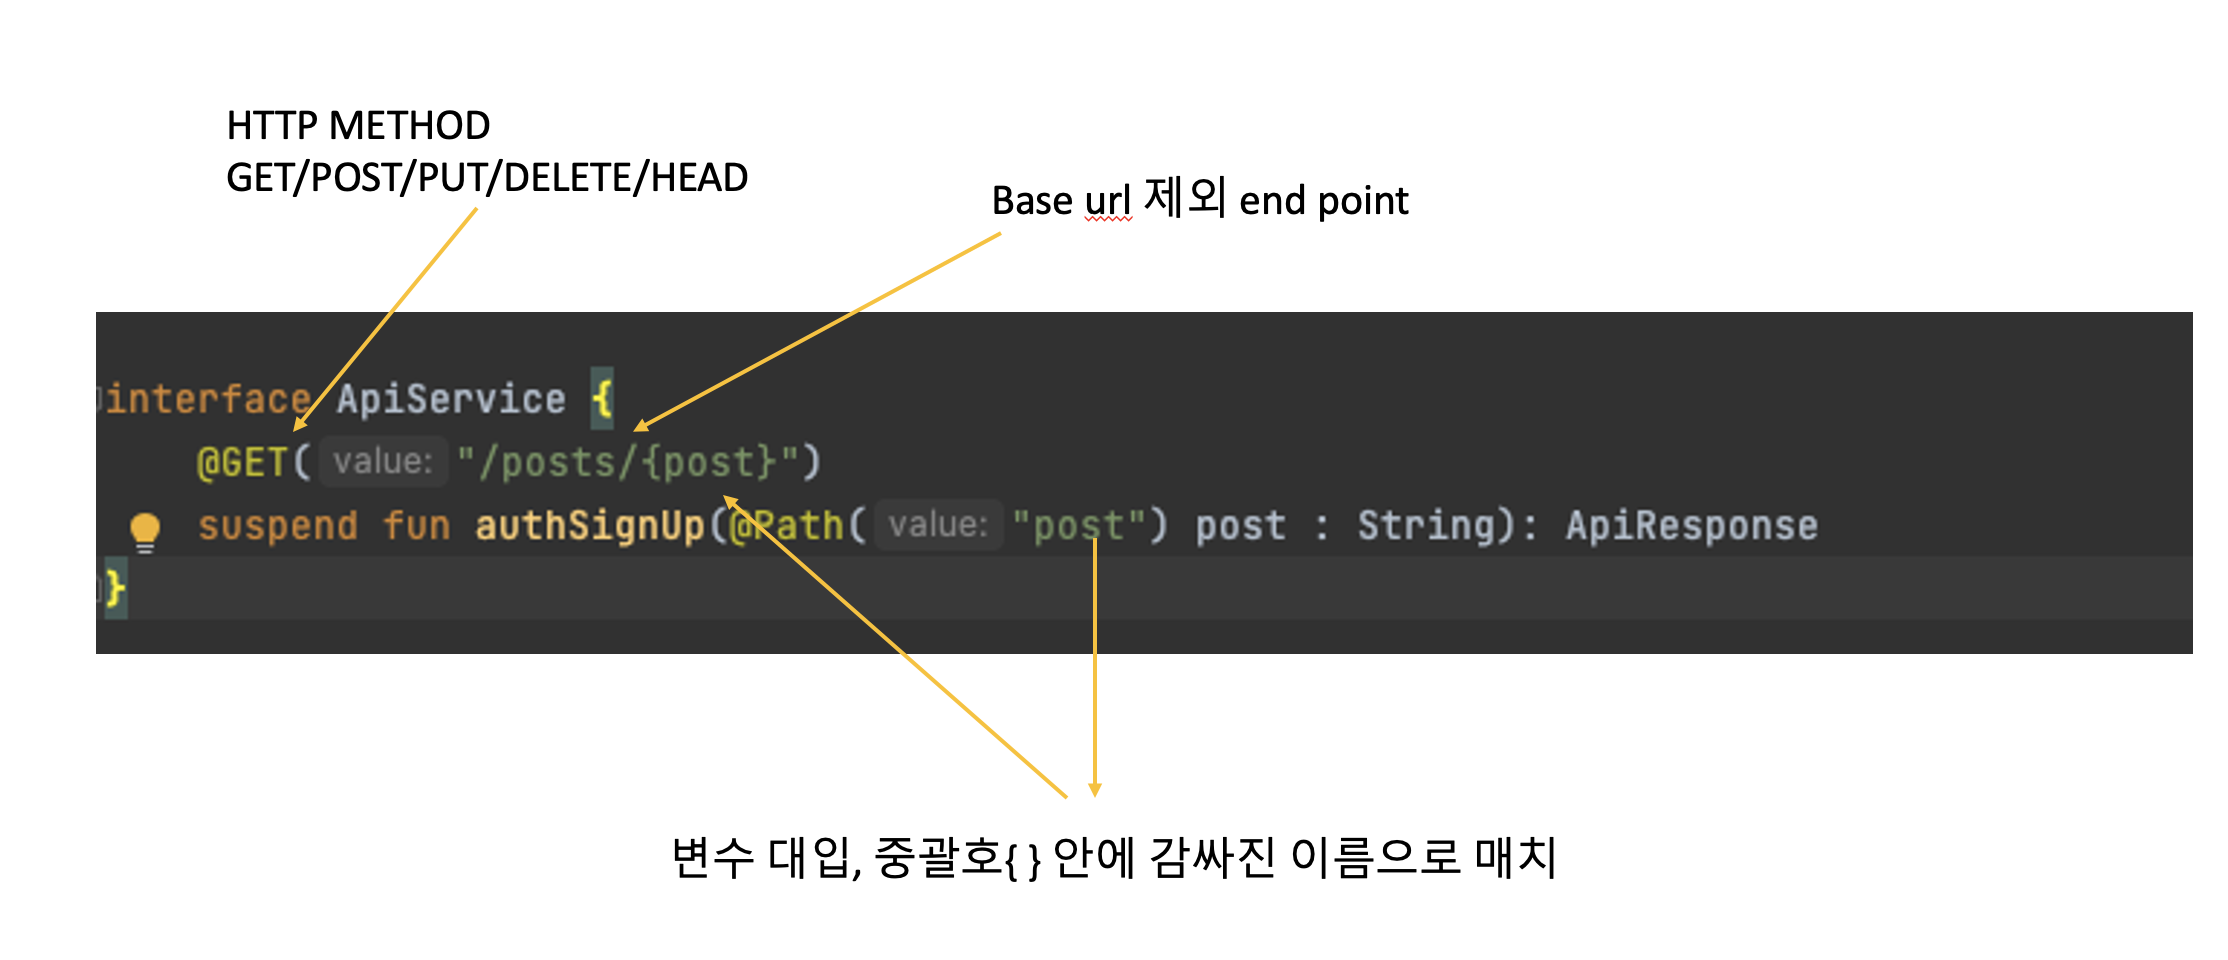
ApiService
interface ApiService {
    @GET("/posts/{post}")
    suspend fun authSignUp(@Path("post") post : String): ApiResponse
}
사용할 HTTP 메소드를 정의하는 곳이다. 레트로핏의 어노테이션을 해주어야 동작한다.
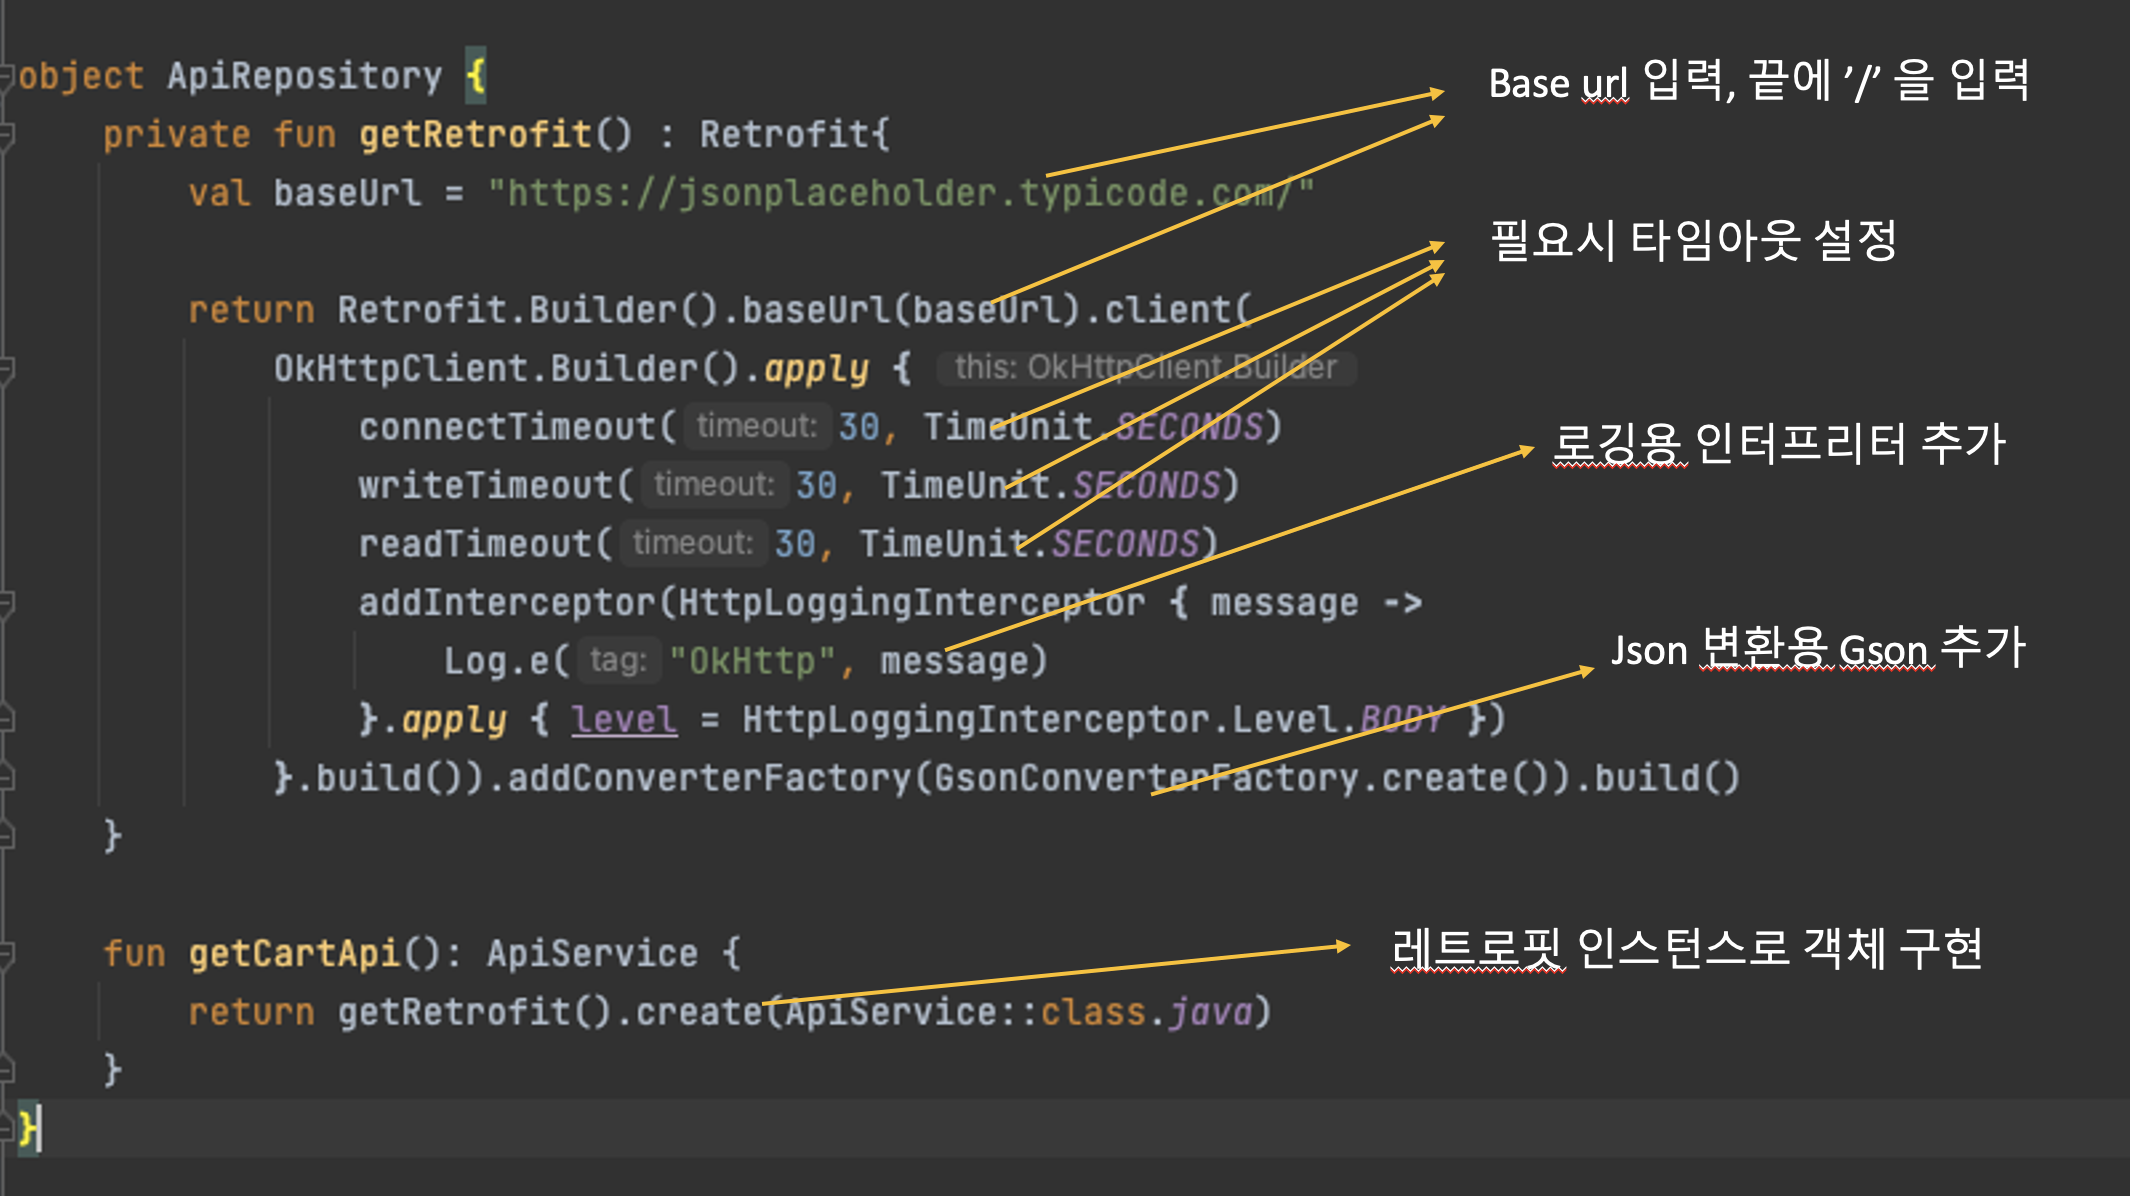
ApiRepository
object ApiRepository {
    private fun getRetrofit() : Retrofit{
        val baseUrl = "https://jsonplaceholder.typicode.com/"

        return Retrofit.Builder().baseUrl(baseUrl).client(
            OkHttpClient.Builder().apply {
                connectTimeout(30, TimeUnit.SECONDS)
                writeTimeout(30, TimeUnit.SECONDS)
                readTimeout(30, TimeUnit.SECONDS)
                addInterceptor(HttpLoggingInterceptor { message ->
                    Log.e("OkHttp", message)
                }.apply { level = HttpLoggingInterceptor.Level.BODY })
            }.build()).addConverterFactory(GsonConverterFactory.create()).build()
    }

    fun getCartApi(): ApiService {
        return getRetrofit().create(ApiService::class.java)
    }
}
싱글톤 패턴으로 클래스를 만들어준다. 자바로 싱글톤 패턴을 만들면 보일러 플레이트가 생기지만 코틀린은 그냥 object로 생성하면된다.
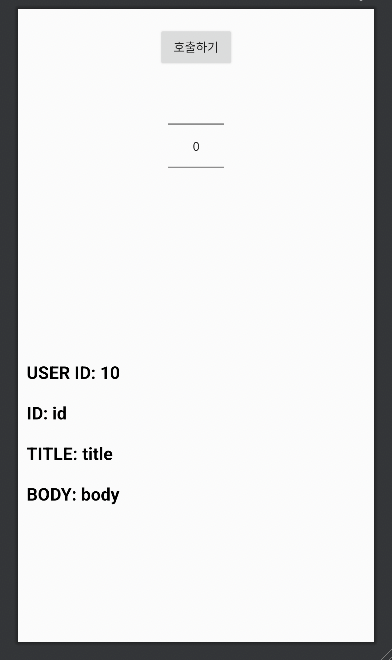
실행시키면 다음과 같이 나온다.
전체코드는 아래 링크에서 볼수있다.
https://github.com/cellodove/Retrofit_Example
참조
http://devflow.github.io/retrofit-kr/