
[Android] 컨캣 어댑터를 사용, 리사이클러뷰 만들기

리사이클러뷰 컨캣 어댑터
이번에는 새로나온 Concat Adapter에 대해서 알아보겠다. 처음부터 이름이 Concat은 아니였다.
처음에는 Merge Adapter라는 이름으로 나왔지만 후에 Concat Adapter로 이름이 변경 되었다.
리사이클러뷰는 하나의 Adapter만 가지며 반복되는 뷰 아이템을 사용한다. 그렇기에 리스트에 Header 또는 Footer 등을 표현하기위해서는 타입이나 포지션으로 구분하고 타입에 맞게 뷰를 지정해야한다. 그래서 리스트가 복잡해 질수록 adapter의 코드도 복잡해지고 비대해진다.
이러한 단점을 해결하기위해 컨캣어탭터가 새로 나왔다.
MyAdapter adapter1 = ...;
AnotherAdapter adapter2 = ...;
ConcatAdapter concatenated = new ConcatAdapter(adapter1, adapter2);
recyclerView.setAdapter(concatenated);
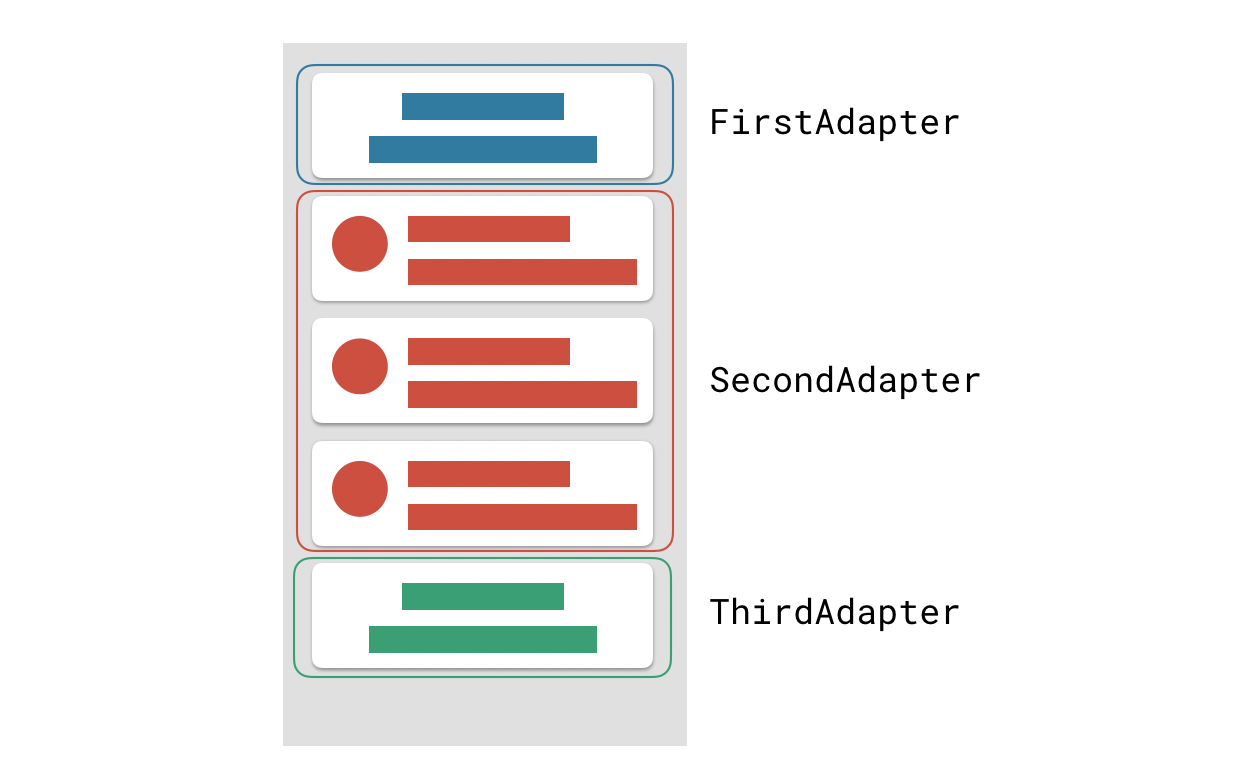
컨캣 어댑터는 리사이클러뷰가 Multiple Adapter를 가지도록 도와주는 어댑터라고 생각하면 된다.
뷰타입에 맞게 어댑터가 분리가 되어 유지보수에 더 유용하다.
리사이클러뷰 컨캣어댑터 만들기
전에 뷰 타입을 사용해 해더가 있는 리사이클러뷰를 만드는 글을 쓴적이있다. 이번에 컨캣어댑터를 사용하면 너무나 간단하게 사용할 수 있다. 그래서 이번엔 한단계 더 나아가 각각의 어댑터 별로 레이아웃이 다르게 동작하게 만들어볼 것이다.
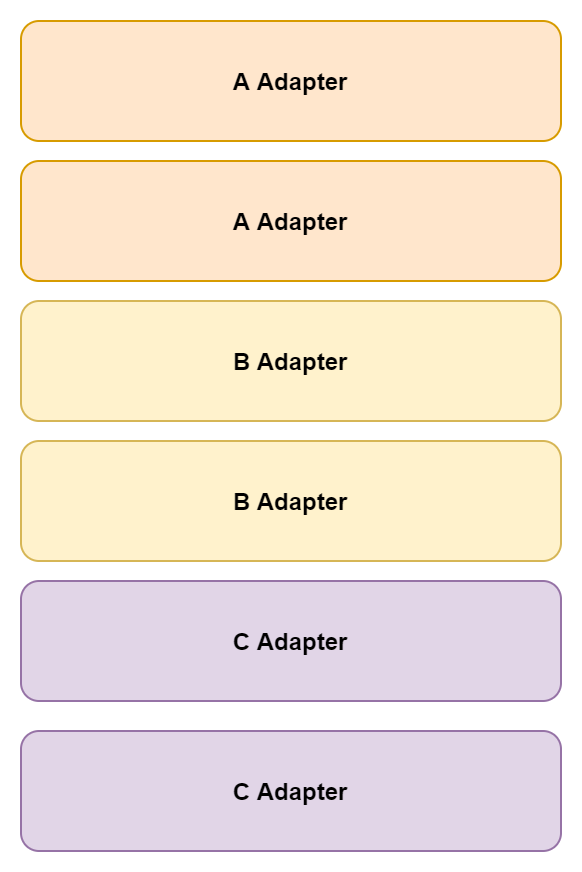
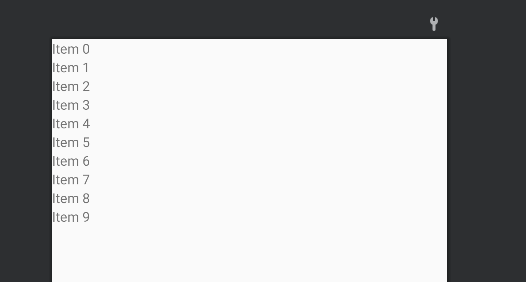
기본적으로 컨캣어댑터를 사용하면 컨캣어댑터의 레이아웃 메니저 세팅에 하위 어댑터들도 적용된다. 해더와 푸터용으로 사용하면 별상관이없지만 각각의 어댑터에 2개 이상의 아이템을넣어 움직이는 어댑터를 만들려면 다음과같이 보여지게된다.
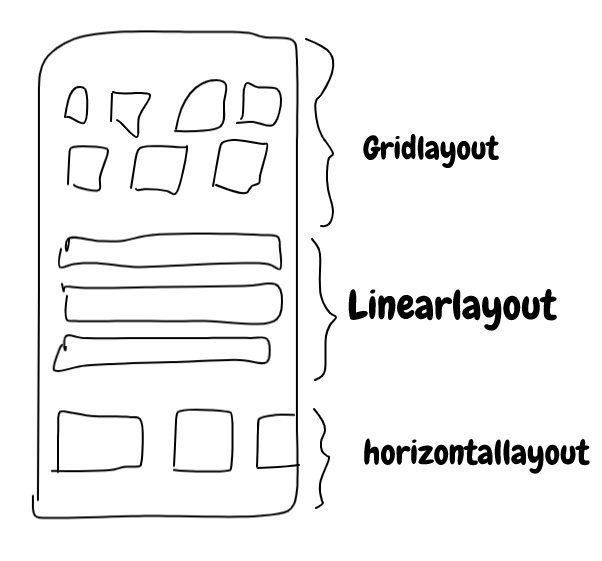
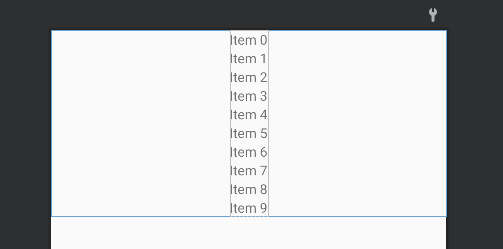
이렇게 보여지는것 대신 이번에 만들 어댑터는 다음과 같이 보여지도록 만들어 볼려고한다.
방법은 처음에는 어려운데 한번해보면 해볼만하다.
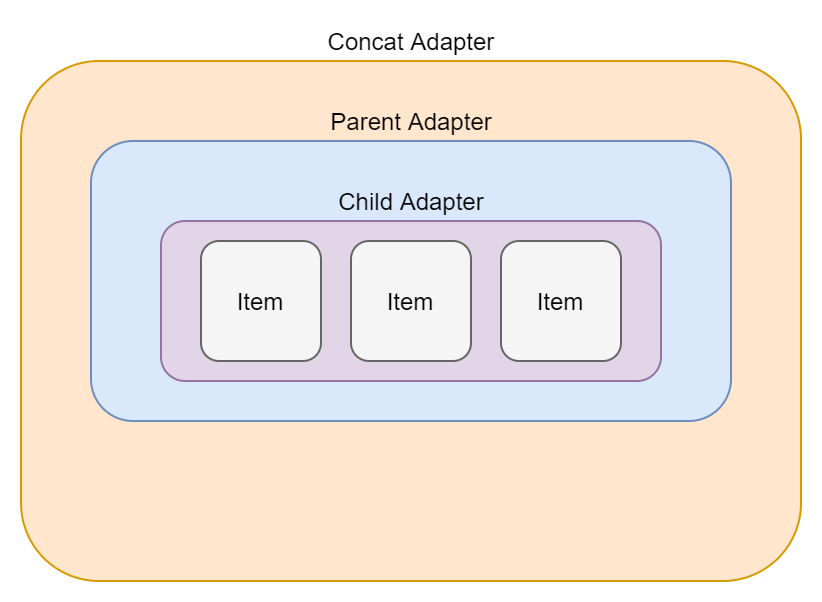
컨캣 어댑터에 들어가는 부모 어댑터안에 또 자식 어댑터를 넣는것이다. 쉽게말하면 부모 어댑터의 아이템을 리사이클러뷰로 하고 그 리사이클러뷰를 자식 어댑터와 연결시킨다.
이번에 만들 어플은 학생들과 학과, 사무실등이 표출되는 어플이다.
- Dependency
- xml
- model
- DataSource
- Adapter
- Activity
Dependency
컨캣어댑터를 사용할려면 1.2.0이상 버전을 사용해야한다.
버전뒤에 알파,베타,rc 코드가 붙는경우가 있는데 이 코드에 대한 자세한 내용은 링크에서 확인할 수 있다.
그래들에 아래 코드를 추가한다.
implementation "androidx.recyclerview:recyclerview:1.3.0-alpha01"
xml
- activity_main.xml
<?xml version="1.0" encoding="utf-8"?>
<androidx.constraintlayout.widget.ConstraintLayout xmlns:android="http://schemas.android.com/apk/res/android"
    xmlns:app="http://schemas.android.com/apk/res-auto"
    xmlns:tools="http://schemas.android.com/tools"
    android:layout_width="match_parent"
    android:layout_height="match_parent"
    tools:context=".MainActivity">
    <androidx.recyclerview.widget.RecyclerView
        android:id="@+id/recyclerView"
        android:layout_width="0dp"
        android:layout_height="0dp"
        app:layout_constraintBottom_toBottomOf="parent"
        app:layout_constraintEnd_toEndOf="parent"
        app:layout_constraintStart_toStartOf="parent"
        app:layout_constraintTop_toTopOf="parent"
        app:layoutManager="androidx.recyclerview.widget.LinearLayoutManager"/>
</androidx.constraintlayout.widget.ConstraintLayout>
- address_grid_item.xml (레이아웃 매니저를 설정한다.)
<?xml version="1.0" encoding="utf-8"?>
<androidx.constraintlayout.widget.ConstraintLayout xmlns:android="http://schemas.android.com/apk/res/android"
    android:layout_width="match_parent"
    android:layout_height="wrap_content"
    xmlns:app="http://schemas.android.com/apk/res-auto">
    <androidx.recyclerview.widget.RecyclerView
        android:id="@+id/gridRecycler"
        android:layout_width="wrap_content"
        android:layout_height="wrap_content"
        app:layout_constraintBottom_toBottomOf="parent"
        app:layout_constraintEnd_toEndOf="parent"
        app:layout_constraintStart_toStartOf="parent"
        app:layout_constraintTop_toTopOf="parent"/>
</androidx.constraintlayout.widget.ConstraintLayout>
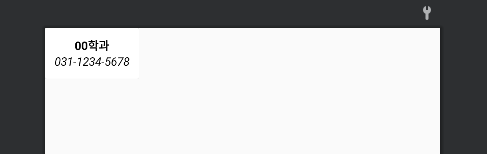
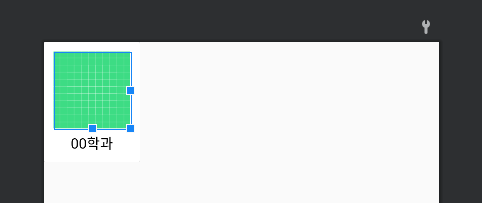
- address_item.xml (보여줄 아이템)
<?xml version="1.0" encoding="utf-8"?>
<androidx.constraintlayout.widget.ConstraintLayout xmlns:android="http://schemas.android.com/apk/res/android"
    android:layout_width="wrap_content"
    android:layout_height="wrap_content"
    xmlns:app="http://schemas.android.com/apk/res-auto">
    <androidx.cardview.widget.CardView
        android:layout_width="wrap_content"
        android:layout_height="wrap_content"
        app:layout_constraintBottom_toBottomOf="parent"
        app:layout_constraintEnd_toEndOf="parent"
        app:layout_constraintStart_toStartOf="parent"
        app:layout_constraintTop_toTopOf="parent">
        <LinearLayout
            android:layout_width="match_parent"
            android:layout_height="wrap_content"
            android:padding="10dp"
            android:orientation="vertical">
            <TextView
                android:id="@+id/addressName"
                android:layout_width="match_parent"
                android:layout_height="wrap_content"
                android:gravity="center"
                android:text="00학과"
                android:textSize="12dp"
                android:textColor="@color/black"
                android:textStyle="bold"/>
            <TextView
                android:id="@+id/addressNumber"
                android:layout_width="match_parent"
                android:layout_height="wrap_content"
                android:gravity="center"
                android:text="031-1234-5678"
                android:textSize="12dp"
                android:textColor="@color/black"
                android:textStyle="italic"/>
        </LinearLayout>
    </androidx.cardview.widget.CardView>
</androidx.constraintlayout.widget.ConstraintLayout>
- depart_linear_item.xml (레이아웃 매니저를 설정한다.)
<?xml version="1.0" encoding="utf-8"?>
<androidx.constraintlayout.widget.ConstraintLayout xmlns:android="http://schemas.android.com/apk/res/android"
    android:layout_width="wrap_content"
    android:layout_height="wrap_content"
    xmlns:app="http://schemas.android.com/apk/res-auto">
    <androidx.recyclerview.widget.RecyclerView
        android:id="@+id/linearRecycler"
        android:layout_width="wrap_content"
        android:layout_height="wrap_content"
        app:layout_constraintBottom_toBottomOf="parent"
        app:layout_constraintEnd_toEndOf="parent"
        app:layout_constraintStart_toStartOf="parent"
        app:layout_constraintTop_toTopOf="parent"/>
</androidx.constraintlayout.widget.ConstraintLayout>
- depart_item.xml (보여줄 아이템)
<?xml version="1.0" encoding="utf-8"?>
<androidx.constraintlayout.widget.ConstraintLayout xmlns:android="http://schemas.android.com/apk/res/android"
    android:layout_width="wrap_content"
    android:layout_height="wrap_content"
    xmlns:app="http://schemas.android.com/apk/res-auto">
    <androidx.cardview.widget.CardView
        android:layout_width="wrap_content"
        android:layout_height="wrap_content"
        app:layout_constraintBottom_toBottomOf="parent"
        app:layout_constraintEnd_toEndOf="parent"
        app:layout_constraintStart_toStartOf="parent"
        app:layout_constraintTop_toTopOf="parent">
        <LinearLayout
            android:layout_width="match_parent"
            android:layout_height="wrap_content"
            android:padding="10dp"
            android:orientation="vertical">
            <ImageView
                android:id="@+id/departImage"
                android:layout_width="80dp"
                android:layout_height="80dp"
                android:src="@drawable/ic_launcher_background"/>
            <TextView
                android:id="@+id/departName"
                android:layout_width="match_parent"
                android:layout_height="wrap_content"
                android:layout_marginTop="5dp"
                android:gravity="center"
                android:text="00학과"
                android:textSize="15dp"
                android:textColor="@color/black"/>
        </LinearLayout>
    </androidx.cardview.widget.CardView>
</androidx.constraintlayout.widget.ConstraintLayout>
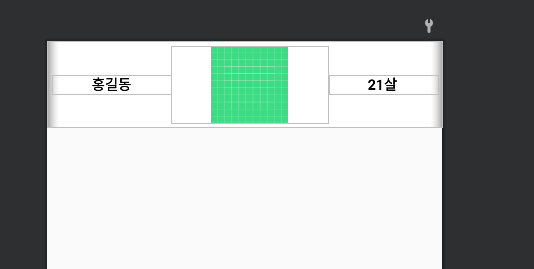
- user_item.xml
<?xml version="1.0" encoding="utf-8"?>
<androidx.constraintlayout.widget.ConstraintLayout xmlns:android="http://schemas.android.com/apk/res/android"
    android:layout_width="match_parent"
    android:layout_height="wrap_content"
    xmlns:app="http://schemas.android.com/apk/res-auto">
    <androidx.cardview.widget.CardView
        android:layout_width="match_parent"
        android:layout_height="wrap_content"
        app:layout_constraintBottom_toBottomOf="parent"
        app:layout_constraintEnd_toEndOf="parent"
        app:layout_constraintStart_toStartOf="parent"
        app:layout_constraintTop_toTopOf="parent">
        <LinearLayout
            android:layout_width="match_parent"
            android:layout_height="wrap_content"
            android:orientation="horizontal"
            android:padding="5dp"
            android:weightSum="3"
            android:gravity="center">
            <TextView
                android:id="@+id/userName"
                android:layout_width="wrap_content"
                android:layout_height="wrap_content"
                android:gravity="center"
                android:layout_weight="1"
                android:text="홍길동"
                android:textSize="15dp"
                android:textStyle="bold"
                android:textColor="@color/black"/>
            <ImageView
                android:id="@+id/userImage"
                android:layout_width="80dp"
                android:layout_height="80dp"
                android:layout_weight="1"
                android:src="@drawable/ic_launcher_background"/>
            <TextView
                android:id="@+id/userAge"
                android:layout_width="wrap_content"
                android:layout_height="wrap_content"
                android:gravity="center"
                android:layout_weight="1"
                android:text="21살"
                android:textSize="15dp"
                android:textStyle="bold"
                android:textColor="@color/black"/>
        </LinearLayout>
    </androidx.cardview.widget.CardView>
</androidx.constraintlayout.widget.ConstraintLayout>
Model
- Address.kt (학과 전화번호)
data class Address (
    val addressName:String,
    val addressNumber:String
    )
- Department.kt (학과 이미지)
data class Department(
    val departImage:Int,
    val departName:String
)
- User.kt (학생 정보)
data class User(
    val name:String,
    val image: Int,
    val age: String
)
DataSource
이번에는 따로 뷰모델을 만들지 않고 데이터소스를만들어 바로 데이터를 가져오는형태로 만들예정이다.
object DataSource {
    fun getUser() = ArrayList<User>().apply {
        add(User("홍길동",R.drawable.grandfather1_icon,"50"))
        add(User("배추도사",R.drawable.grandfather2_icon,"70"))
        add(User("깔끔이",R.drawable.dentist_icon,"25"))
        add(User("홍길순",R.drawable.grandmother1_icon,"51"))
        add(User("한여름",R.drawable.grandmother2_icon,"45"))
        add(User("상남자",R.drawable.man1_icon,"21"))
        add(User("호크아이",R.drawable.man2_icon,"30"))
        add(User("스타크",R.drawable.scientist_icon,"35"))
        add(User("블랙위도우",R.drawable.woman1_icon,"29"))
        add(User("이세경",R.drawable.woman2_icon,"21"))
        add(User("백세나",R.drawable.woman3_icon,"28"))
    }

    fun getDepartment() = ArrayList<Department>().apply {
        add(Department(R.drawable.machine_icon,"기계공학"))
        add(Department(R.drawable.chemistry_icon,"화학공학"))
        add(Department(R.drawable.computer_icon,"컴퓨터공학"))
        add(Department(R.drawable.doctor_icon,"의학"))
        add(Department(R.drawable.electricity_icon,"전기전자"))
        add(Department(R.drawable.english_icon,"영어영문"))
        add(Department(R.drawable.management_icon,"경영학"))
        add(Department(R.drawable.nurse_icon,"간호학"))
        add(Department(R.drawable.psychology_icon,"심리학"))
    }

    fun getAddress() = ArrayList<Address>().apply {
        add(Address("학과사무실","010-1234-5678"))
        add(Address("홍길동 연구실","010-9101-2345"))
        add(Address("상황실","010-6789-1012"))
        add(Address("방재실","010-3456-7891"))
        add(Address("위원회","010-0123-4567"))
        add(Address("대학원","010-8910-1234"))
        add(Address("총장실","010-5678-9101"))
        add(Address("부총장실","010-2345-6789"))
        add(Address("이사장","010-1012-3456"))
        add(Address("방송부","010-7891-0123"))
    }
}
데이터에 들어간 이미지는 기호에 맞게 알아서 다시 세팅해주면 된다.
Adapter
먼저 기본이 되는 Item을 뿌려주는 Child Adapter(Item Adapter)를 만들겠다. 기존에 만들던 Adapter와 동일하다. 여기서는 ListAdapter를 사용해 만들었다.
그리고 앱에있는 xml연결은 모두 뷰바인딩을 통해 이루어진다.
- AddressAdapter.kt
class AddressAdapter(private val clickItem: (Address) -> Unit ):ListAdapter<Address, AddressAdapter.AddressViewHolder>(diffUtil){
    override fun onCreateViewHolder(parent: ViewGroup, viewType: Int): AddressViewHolder {
        val binding = AddressItemBinding.inflate(LayoutInflater.from(parent.context),parent,false)
        val addressViewHolder = AddressViewHolder(binding)
        binding.root.setOnClickListener {
            clickItem(getItem(addressViewHolder.bindingAdapterPosition))
        }
        return addressViewHolder
    }

    override fun onBindViewHolder(holder: AddressViewHolder, position: Int) {
        holder.bind(getItem(position))
    }

    inner class AddressViewHolder(private val binding: AddressItemBinding):RecyclerView.ViewHolder(binding.root){
        fun bind(address : Address){
            binding.addressName.text = address.addressName
            binding.addressNumber.text = address.addressNumber

        }
    }

    companion object{
        val diffUtil = object : DiffUtil.ItemCallback<Address>(){
            override fun areItemsTheSame(oldItem: Address, newItem: Address): Boolean {
                return oldItem == newItem
            }

            override fun areContentsTheSame(oldItem: Address, newItem: Address): Boolean {
                return oldItem.addressName == newItem.addressName
            }
        }
    }
}
아이템을 클릭하면 해당아이템의 정보를 Toast로 표출하기위해 클릭 리스너를 달았다.
여기서 주의할 점은
binding.root.setOnClickListener {
    clickItem(getItem(addressViewHolder.layoutPosition))
}
일반적인 어댑터에서는 다음과같이 레이아웃의 위치를 가지고와 아이템의 위치를 알아냈다.
하지만 이번에는 여러 어댑터가 중첩되어있기 때문에 레이아웃의 위치와 실제 아이템의 위치가 다르기때문에 저렇게하면 인덱스 에러가 나게된다.
그렇기에 레이아웃의 위치가 아닌 어댑터의 내의 아이템 위치를 가져와야 한다.
binding.root.setOnClickListener {
    clickItem(getItem(addressViewHolder.bindingAdapterPosition))
}
- DepartmentAdapter.kt
class DepartmentAdapter(private val clickItem: (Department) -> Unit ):ListAdapter<Department, DepartmentAdapter.DepartViewHolder>(diffUtil) {
    override fun onCreateViewHolder(parent: ViewGroup, viewType: Int): DepartViewHolder {
        val binding = DepartItemBinding.inflate(LayoutInflater.from(parent.context),parent,false)
        val departViewHolder = DepartViewHolder(binding)
        binding.root.setOnClickListener {
            clickItem(getItem(departViewHolder.bindingAdapterPosition))
        }
        return departViewHolder
    }

    override fun onBindViewHolder(holder: DepartViewHolder, position: Int) {
        holder.bind(getItem(position))
    }

    inner class DepartViewHolder(private val binding: DepartItemBinding):RecyclerView.ViewHolder(binding.root){
        fun bind(depart:Department){
            binding.departName.text = depart.departName
            binding.departImage.setImageResource(depart.departImage)
        }
    }
    companion object{
        val diffUtil = object : DiffUtil.ItemCallback<Department>(){
            override fun areItemsTheSame(oldItem: Department, newItem: Department): Boolean {
                return newItem == oldItem
            }

            override fun areContentsTheSame(oldItem: Department, newItem: Department): Boolean {
                return  oldItem.departName == newItem.departName
            }
        }
    }
}
- UserAdapter.kt
class UserAdapter(private val itemClick: (User) -> Unit):ListAdapter<User,UserAdapter.UserViewHolder>(diffUtil){
    override fun onCreateViewHolder(parent: ViewGroup, viewType: Int): UserViewHolder {
        val binding = UserItemBinding.inflate(LayoutInflater.from(parent.context), parent, false)
        val userViewHolder = UserViewHolder(binding)
        binding.apply {
            root.setOnClickListener {
                itemClick(getItem(userViewHolder.bindingAdapterPosition))
            }
        }
        return userViewHolder
    }

    override fun onBindViewHolder(holder: UserViewHolder, position: Int) {
        holder.bind(getItem(position))
    }

    inner class UserViewHolder(private val binding: UserItemBinding) : RecyclerView.ViewHolder(binding.root){
        fun bind(user: User){
            binding.userName.text = user.name
            binding.userImage.setImageResource(user.image)
            binding.userAge.text = user.age
        }
    }

    companion object{
        val diffUtil = object  : DiffUtil.ItemCallback<User>(){
            override fun areItemsTheSame(oldItem: User, newItem: User): Boolean {
                return  oldItem == newItem
            }

            override fun areContentsTheSame(oldItem: User, newItem: User): Boolean {
                return oldItem.name == newItem.name
            }
        }
    }
}
이제 레이아웃을 결정하는 Parent Adapter(Layout Adapter)를 만들겠다. 해당 어댑터는 리사이클러뷰 하나의 아이템만 가지고있다. 리사이클러 어댑터를 이용해 만들었다.
- DeaprtLinearAdapter.kt
class DepartLinearAdapter(private val context: Context, private val departmentAdapter: DepartmentAdapter):RecyclerView.Adapter<DepartLinearAdapter.LinearViewHolder>(){
    override fun onCreateViewHolder(parent: ViewGroup, viewType: Int): LinearViewHolder {
        val binding = DepartLinearItemBinding.inflate(LayoutInflater.from(parent.context),parent,false)
        binding.linearRecycler.layoutManager = LinearLayoutManager(context,RecyclerView.HORIZONTAL,false)
        return LinearViewHolder(binding)
    }

    override fun onBindViewHolder(holder: LinearViewHolder, position: Int) {
        holder.bind(departmentAdapter)
    }

    override fun getItemCount(): Int = 1

    inner class LinearViewHolder(private val binding: DepartLinearItemBinding):RecyclerView.ViewHolder(binding.root){
        fun bind(departmentAdapter : DepartmentAdapter) {
            binding.linearRecycler.adapter = departmentAdapter
        }
    }
}
Parent Adapter의 아이템인 리사이클러뷰에 어댑터를 연결해주어야 하기때문에 인자로 어댑터를 받아야한다.
class DepartLinearAdapter(private val context: Context, private val departmentAdapter: DepartmentAdapter)
뷰홀더는 받은 어댑터를 리사이클러뷰와 연결시켜준다.
inner class LinearViewHolder(private val binding: DepartLinearItemBinding):RecyclerView.ViewHolder(binding.root){
    fun bind(departmentAdapter : DepartmentAdapter) {
        binding.linearRecycler.adapter = departmentAdapter
    }
}
onCreateViewHolder 에서 원하는 레이아웃 매니저를 설정해 준다.
override fun onCreateViewHolder(parent: ViewGroup, viewType: Int): LinearViewHolder {
    val binding = DepartLinearItemBinding.inflate(LayoutInflater.from(parent.context),parent,false)
    binding.linearRecycler.layoutManager = LinearLayoutManager(context,RecyclerView.HORIZONTAL,false)
    return LinearViewHolder(binding)
}
이 어댑터에서는 가로로 움직이는 리스트를 만들기위해 위와같이 레이아웃 매니저를 설정했다.
- GridAddressAdapter.kt
class GridAddressAdapter(private val context: Context, private val addressAdapter: AddressAdapter):RecyclerView.Adapter<GridAddressAdapter.GridViewHolder>(){
    override fun onCreateViewHolder(parent: ViewGroup, viewType: Int): GridViewHolder {
        val binding = AddressGridItemBinding.inflate(LayoutInflater.from(parent.context),parent,false)
        binding.gridRecycler.layoutManager = GridLayoutManager(context,4)
        return GridViewHolder(binding)
    }

    override fun onBindViewHolder(holder: GridViewHolder, position: Int) {
        holder.bind(addressAdapter)
    }

    override fun getItemCount(): Int = 1

    inner class GridViewHolder(private val binding: AddressGridItemBinding):RecyclerView.ViewHolder(binding.root){
        fun bind(addressAdapter: AddressAdapter){
            binding.gridRecycler.adapter = addressAdapter
        }
    }
}
해당 어댑터에서는 바둑판과같은 Grid로 레이아웃을 세팅했다.
Activity
이제 액티비티에서 데이터를 아이템 어댑터에 넣어주고, 그 아이템 어댑터를 레이아웃어댑터에 넣어주고, 그 레이아웃 어댑터를 컨캣 어댑터어 넣어주면 완성이다.
- MainActivity.kt
class MainActivity : AppCompatActivity() {
    lateinit var adapter: ConcatAdapter
    lateinit var userAdapter: UserAdapter
    lateinit var departAdapter:DepartmentAdapter
    lateinit var addressAdapter: AddressAdapter

    lateinit var departLinearAdapter: DepartLinearAdapter
    lateinit var gridAddressAdapter: GridAddressAdapter
    private val binding by lazy { ActivityMainBinding.inflate(layoutInflater) }

    override fun onCreate(savedInstanceState: Bundle?) {
        super.onCreate(savedInstanceState)
        setContentView(binding.root)
        setConcatRecycler()
    }

    private fun setConcatRecycler() {
        userAdapter = UserAdapter{ user ->
            Toast.makeText(this,"${user.name} , ${user.age}", Toast.LENGTH_SHORT).show()
        }
        userAdapter.submitList(DataSource.getUser())

        departAdapter = DepartmentAdapter{ department ->
            Toast.makeText(this,"${department.departName}", Toast.LENGTH_SHORT).show()
        }
        departAdapter.submitList(DataSource.getDepartment())
        departLinearAdapter = DepartLinearAdapter(this,departAdapter)

        addressAdapter = AddressAdapter{ address ->
            Toast.makeText(this,"${address.addressName} , ${address.addressNumber}", Toast.LENGTH_SHORT).show()
        }
        addressAdapter.submitList(DataSource.getAddress())
        gridAddressAdapter = GridAddressAdapter(this,addressAdapter)

        val listOfAdapter = listOf(departLinearAdapter,userAdapter,gridAddressAdapter)
        adapter = ConcatAdapter(listOfAdapter)
        binding.recyclerView.adapter = adapter
    }
}
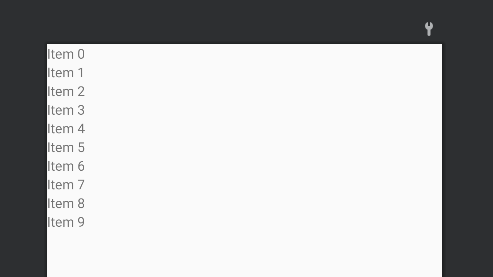
실행시키면 다음과같은 화면이 나온다.
전체코드는 아래 링크에서 볼수있다.
GitHub - cellodove/RecyclerViewConcatAdapter
참조
https://developer.android.com/reference/androidx/recyclerview/widget/ConcatAdapter
https://blog.mindorks.com/implementing-merge-adapter-in-android-tutorial